

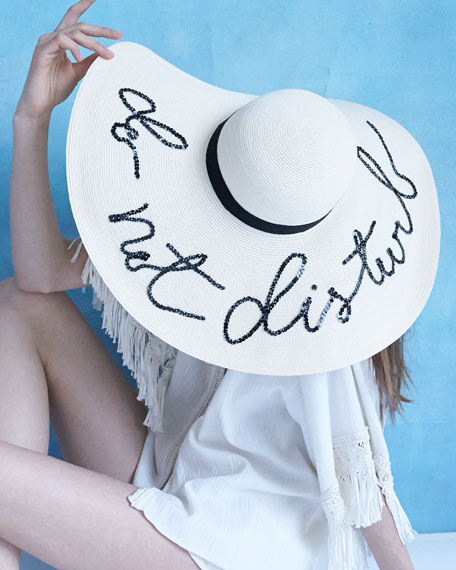
I first saw Eugenia Kim's straw hats on Instagram and then in person at Anthropologie. Who doesn't love a touch of novelty in their fashion? These hats are not just ordinary straw hats. They spell out phrases and sayings that are whimsical. I was quite smitten from the begging, but the sayings did not always fit me or exactly what I wanted to wear on my head. Large sun hats overwhelm my head. I have a small head, really. Recently, I bought a vintage hat with a smaller brim from a consignment store in Quebec City. Since I have been wanting a hat like Eugenia Kim's I thought why not combine this idea with my new “Madeline” style hat and DIY. I decided to go with "Stay Cool". Get the look with steps below.
All you need is a hat, trim of choice (Buy by the yard depending how long your phrase is. I used no more than 3 yards.), straight pins, sewing chalk, needle, thread, scissors, and clear scotch tape.

1. Pick your word or phrase
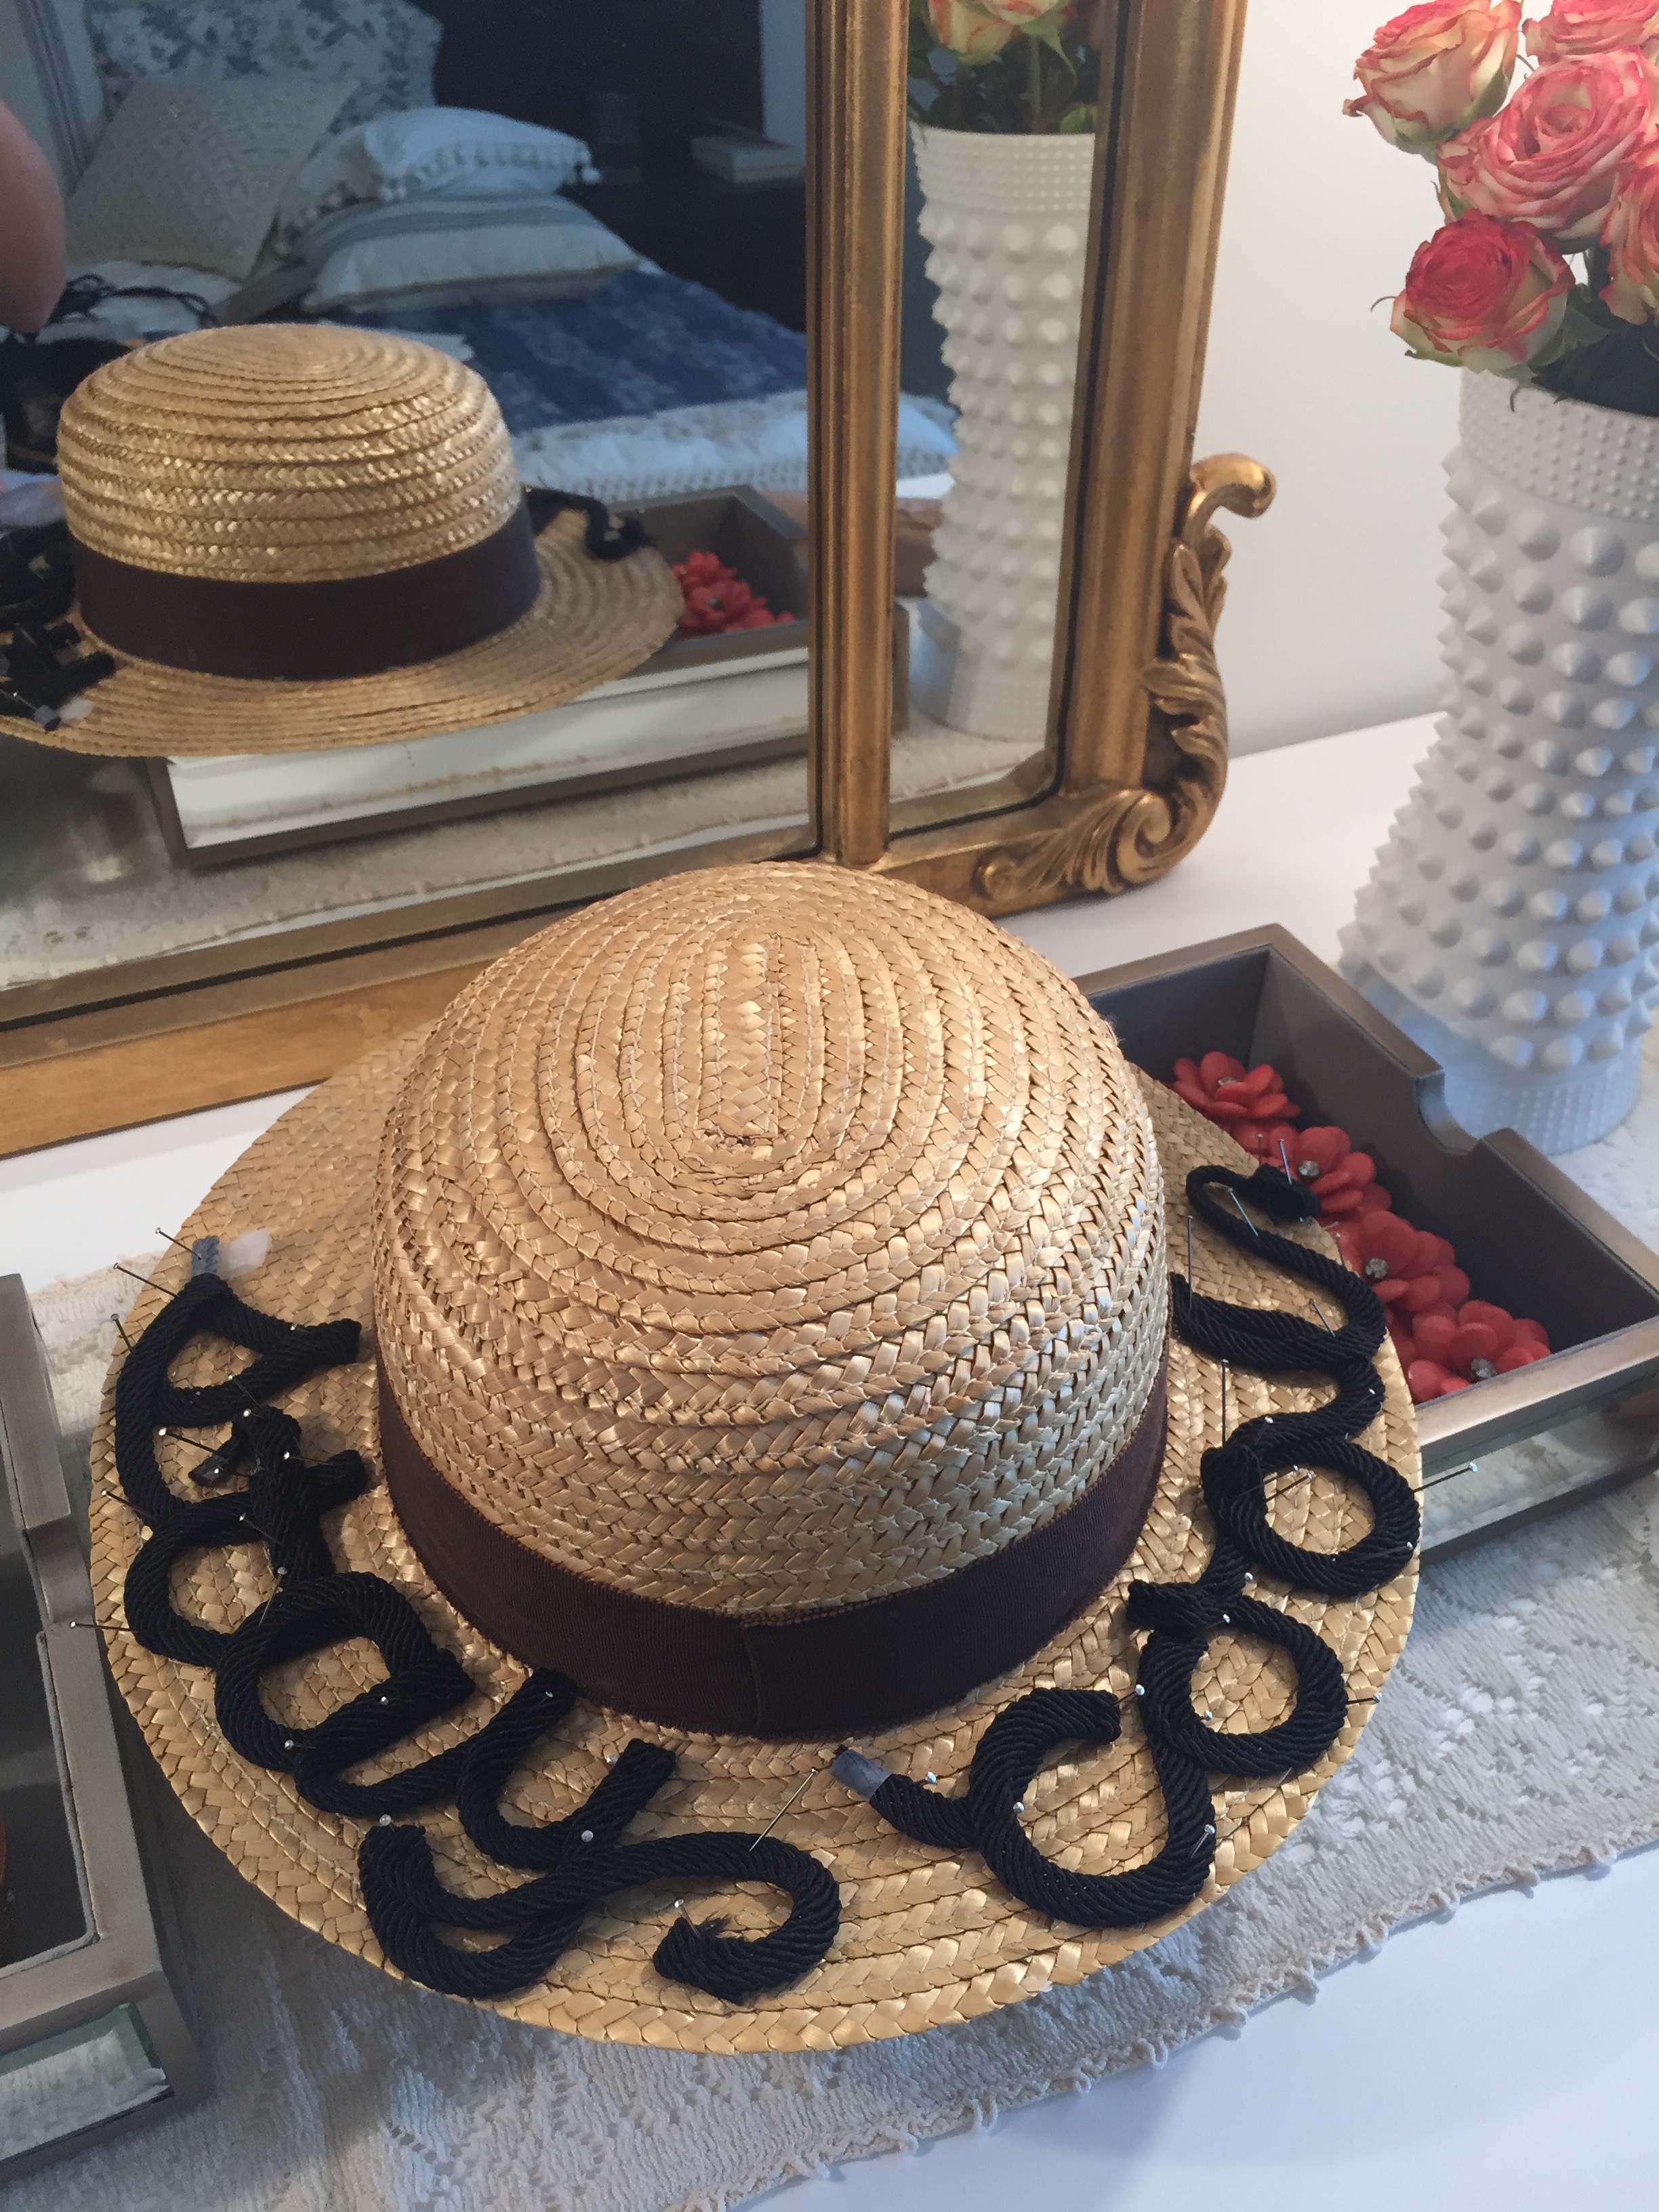
2. Mark the back center of the hat. This is important s you can estimate where to begin writing the phrase out with chalk. You want to align the center of the phrase with the back center of the hat.
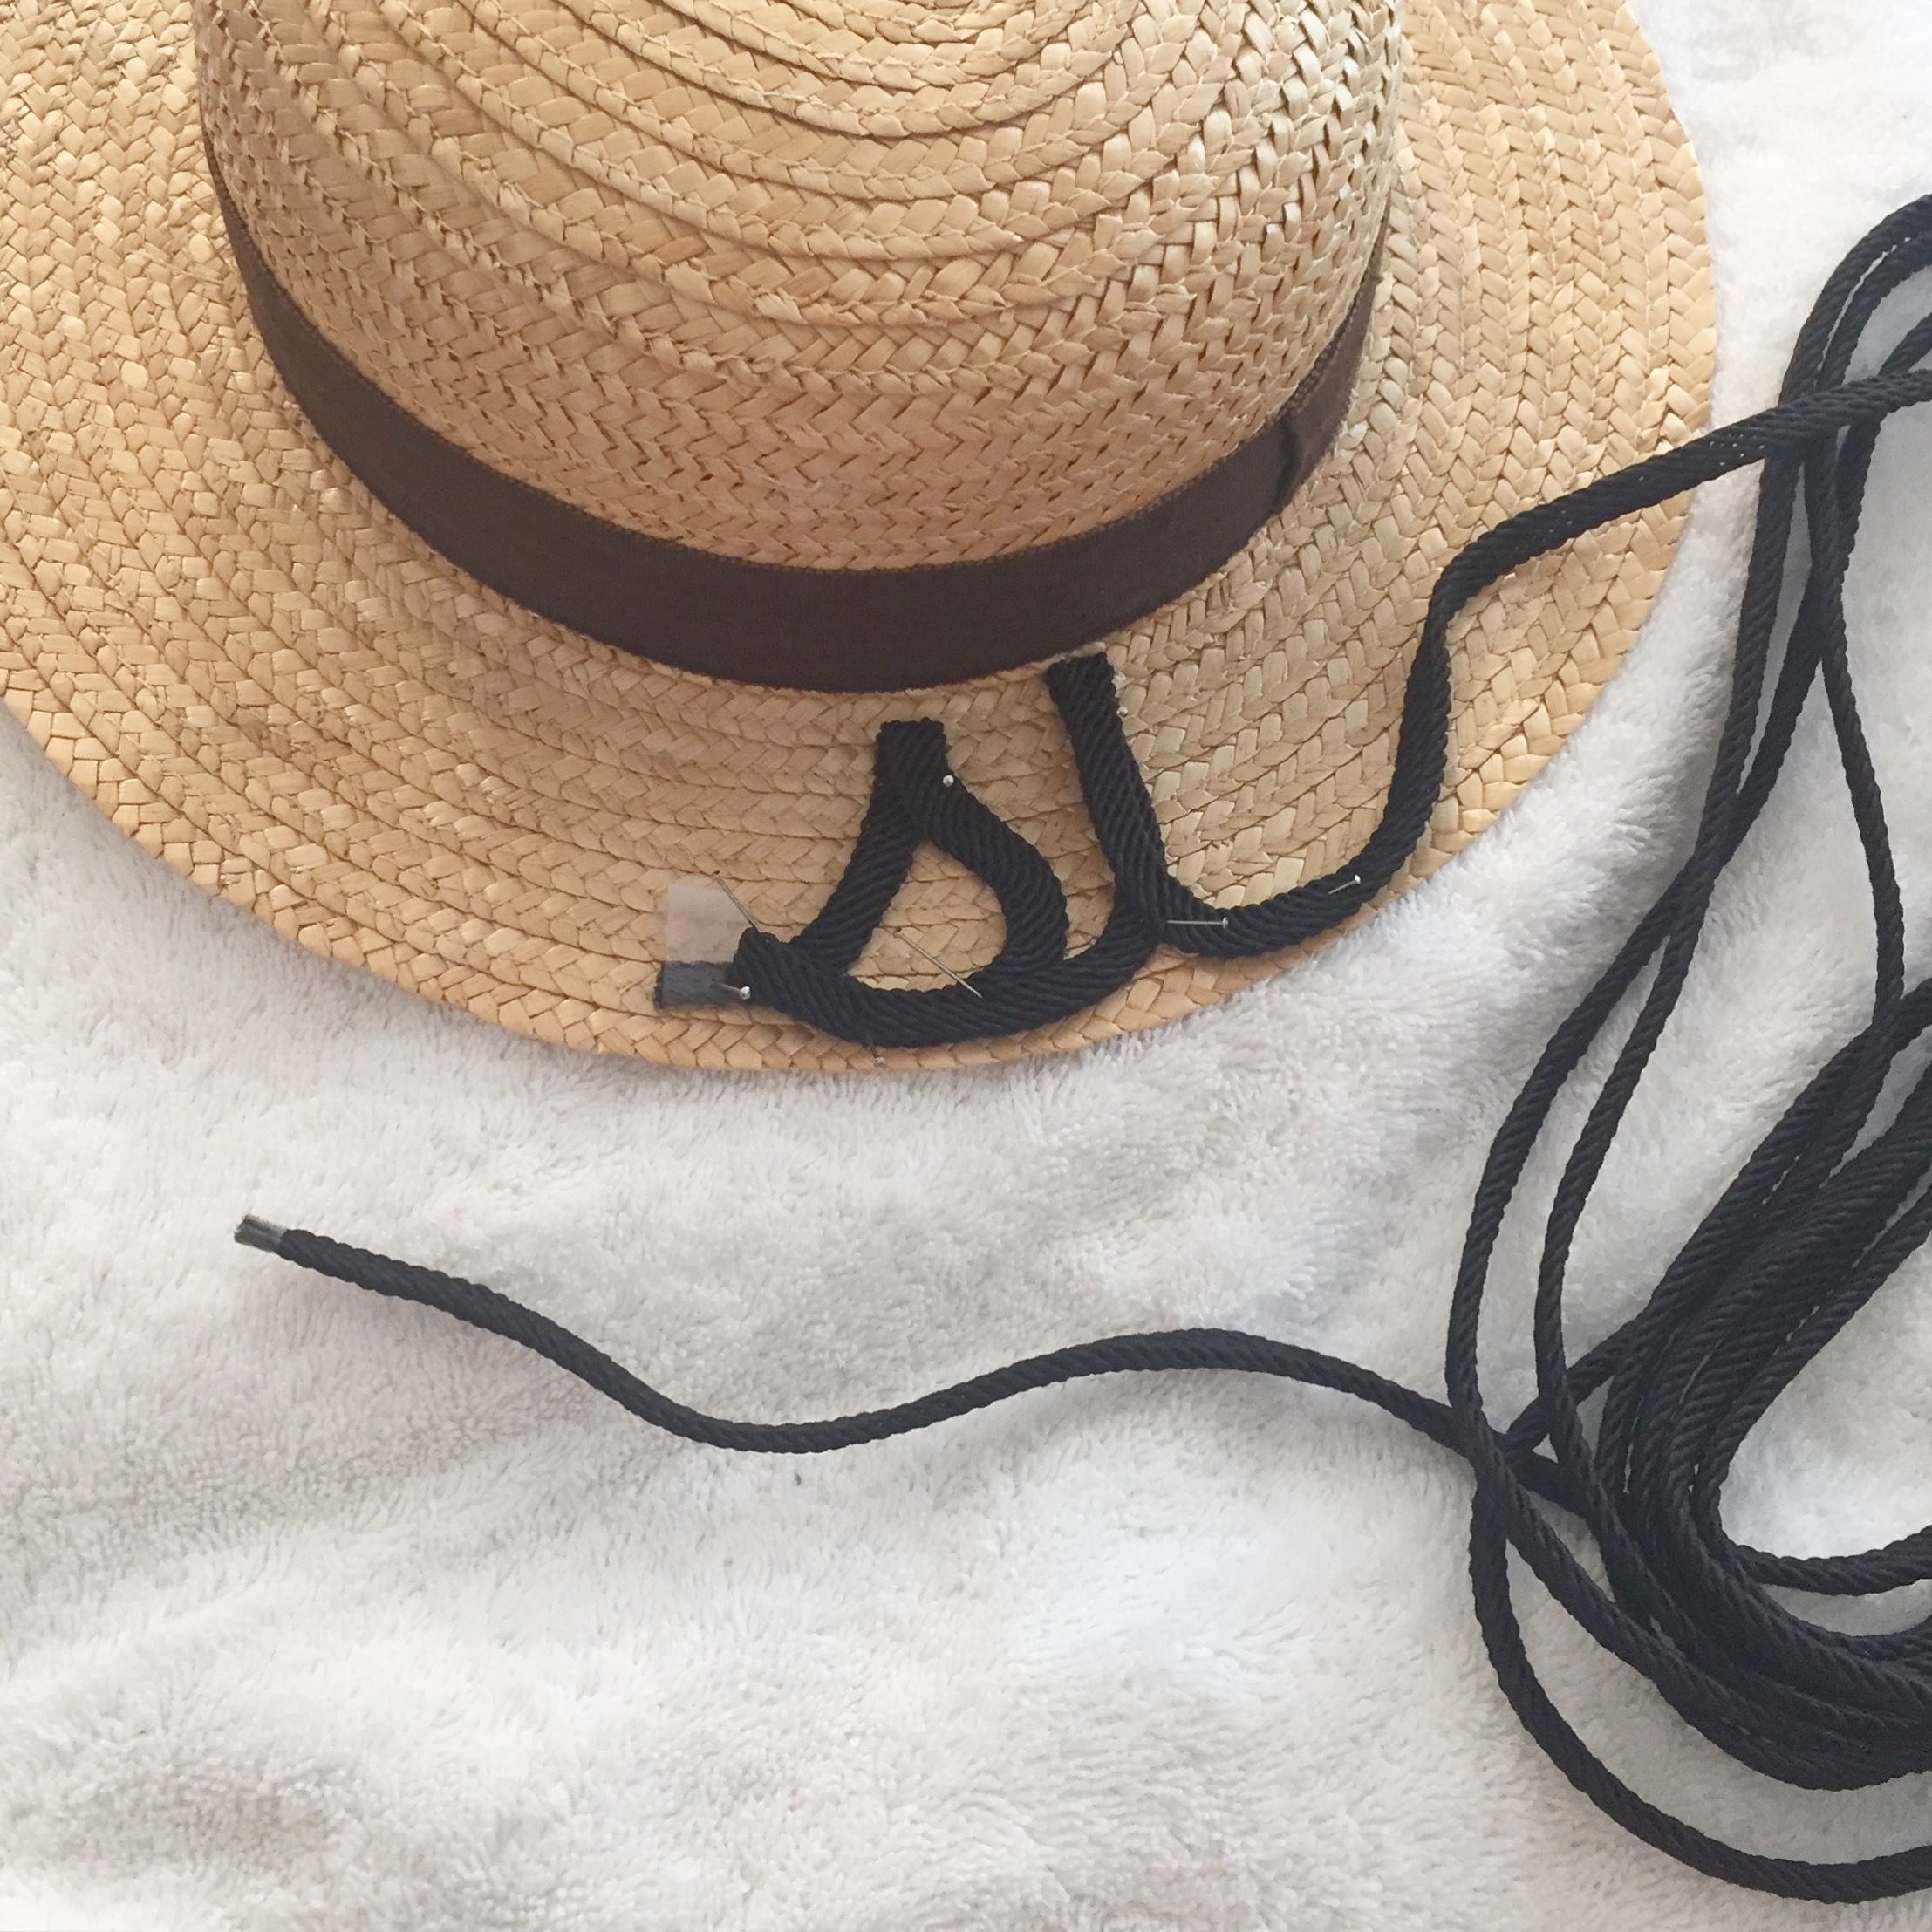
3. Write the phrase in large cursive writing with chalk. I admit skipping this step because I eyed it as I placed the trim out, but eyeing it can be tricky so I recommend writing the words before pinning the trim down to the hat.
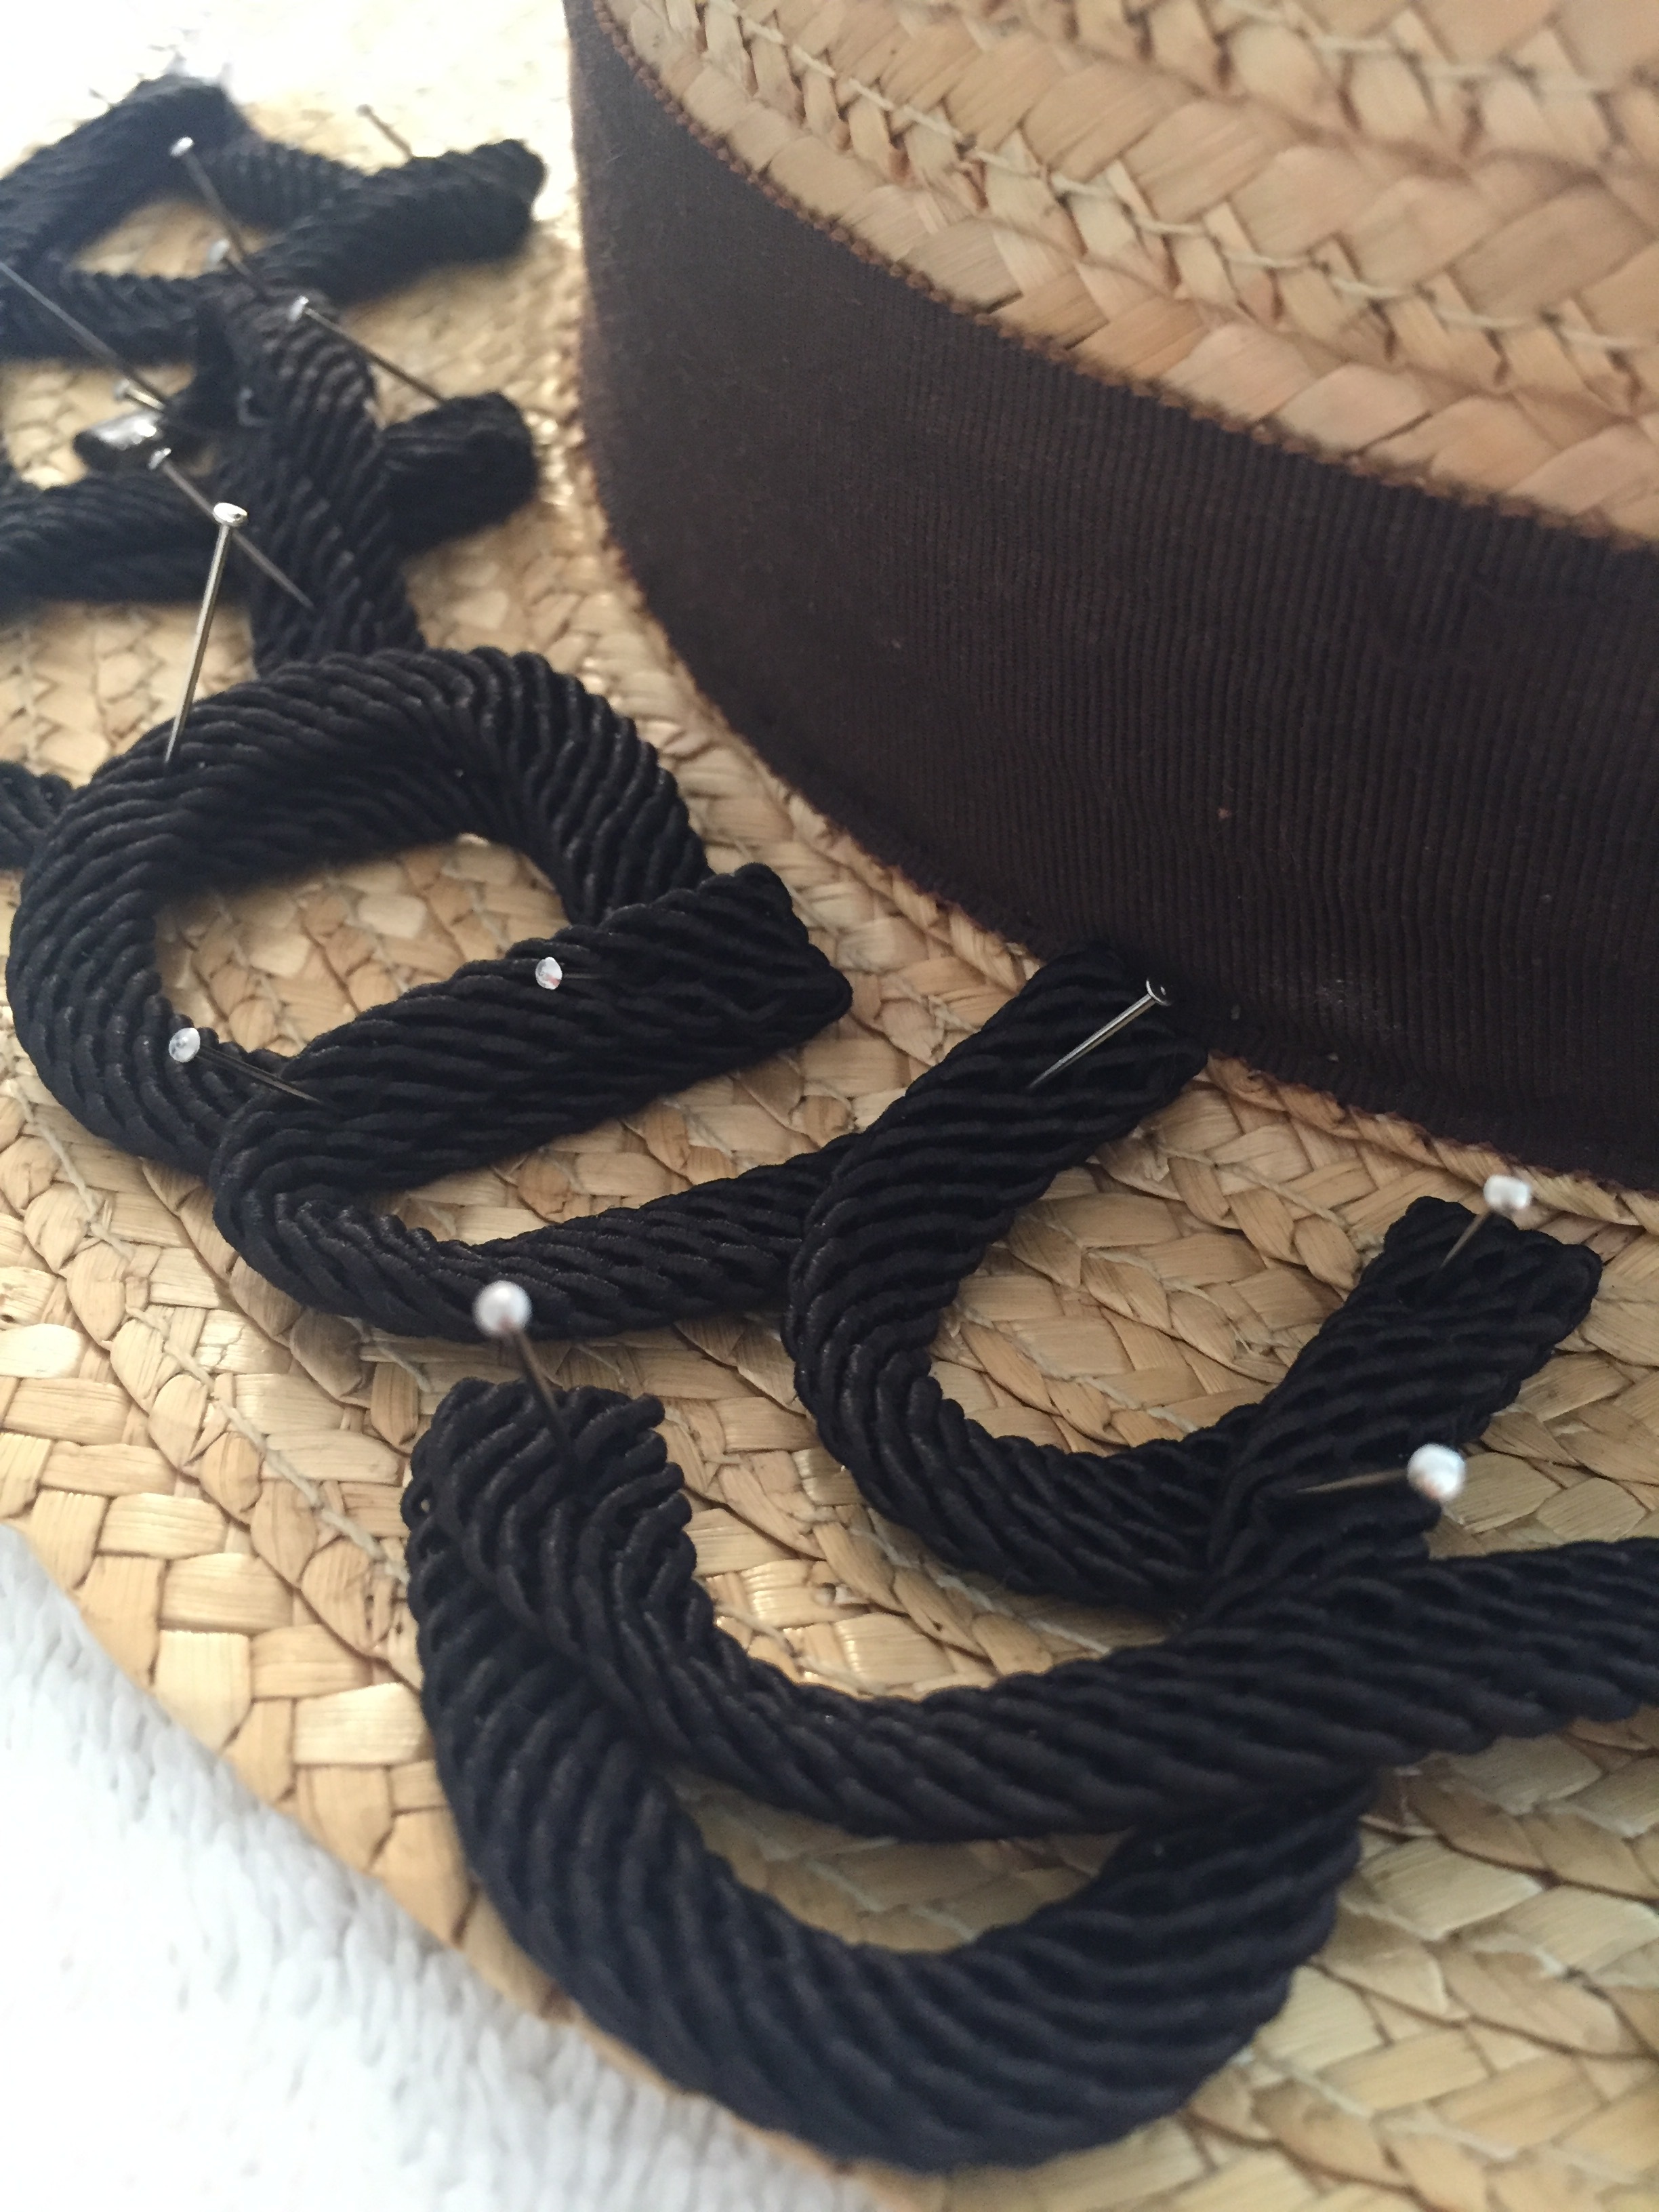
4. Trace chalk with ribbon, letter by letter. Start from one end of the ribbon. Keep trim in one long strand until you know you want an end. For example, I wanted an end to the cross in my "T". See above pic of my hat for reference. Cut the trim at this point and then start back up again in desired place.
Tip: If using similar trim to what I used, the ends of ribbon may unravel easily. This is where Scotch tape comes in hand. It Iis best to use a piece of tape around the end of the trim to keep it together until you are prepared to trim and go back over your ends one more time with a few extra safety stitches.
5. As you trace the chalk letter by letter, stop every half inch or less to pin down as you go. Pin loosely so that it is easy to pull out the pins as you begin stitching.
6. Once pinning is complete, thread needle (double up for strength) about no more than an arms length. Tie a small knot (a few over top one another) and begin sewing from underneath the brim and pull upwards. Be careful to pull stitches in and out between the rows of straw. Straw can be fragile and you do not want to break and tear the straw. If it feels tough to push needle through in any particular place, test out a spot nearby that will push through more easily. I recommend using a thimble because this project can be jarring on the fingertips. Sew along the center of your trim as you go. The width on either side of your stitches should be even and the space in between each stitch should be no more than 1/8th of an inch. When you come to the end of your thread, loop and tie a knot on the underside of brim and begin again with another piece of thread if you are not yet finished. Start off again a quarter of an inch back from where you left off.
7. When finished stitching the full phrase go back and double stitch over any edges like a "T" or letter that has ends. Once you stitch over again, then remove scotch tape and trim cleanly with scissors.
That’s It. Enjoy in the sun or shade!
Xo RCN