


I have many sheets of colorful tissue paper in my gift wrapping stash, so I figure why not put some of the many sheets to use. Forget about waiting for the next Bday, let's turn some tissue into a cacti piñata table centerpiece and some colorful drink swizzle sticks for Cinco de Mayo. Here we go! Follow images and instructions below for cactus and click the video for the DIY swizzle sticks. In keeping with my "Mellow May" detox, I'll be using the drink stirrers in some good old H2O! xo RCN

Cactus Centerpiece - What you need:
Ruler, Pencil, Scissors, Tape (scotch, or any clear tape) + Glue stick (to clean up fly aways), Green tissue paper (about 4 sheets), Pink or any color tissue (1 small sheet), Yellow tissue (1 small piece), Cardboard (I recycled leftover boxes from sparkling water cans), Floral wire + something to cut it to about 3" long, and a small terra cotta pot.

Draw the shape of your cactus onto one plane of the cardboard like pictured below. Cut out and trace onto a second piece of cardboard. My cactus drawn here is about 12" tall and will be 2"wide.
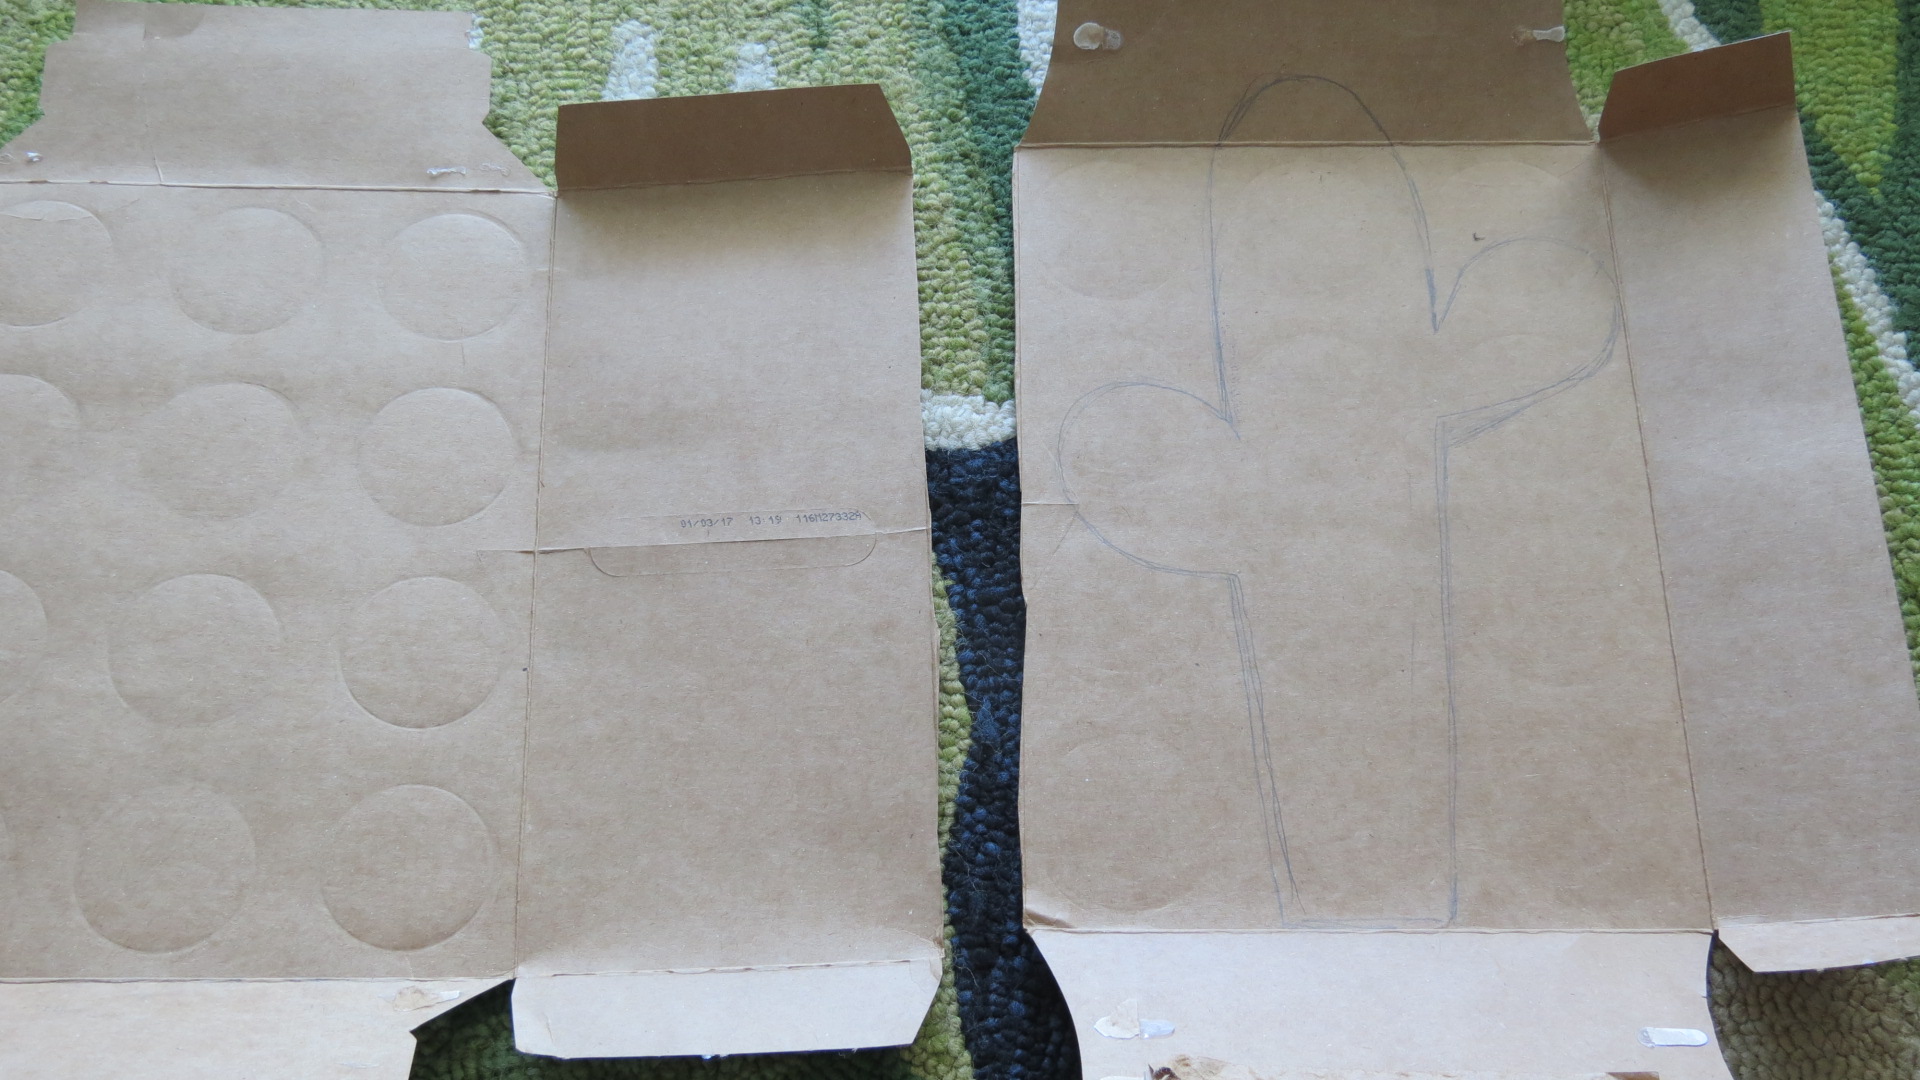
On second piece of cardboard, leave an extra flap of the cardboard at bottom of cactus shape - this will become the base of piñata. In next step you will see exactly how to cut out the second cactus.


Bend the cardboard at the bottom if not already folded from original box shape. When cutting cactus include the extra flap. Flap should be about 2 3/4" in length.

Fold 3/4" away from edge of flap. This edge will be the corner to tape and connect the other front and back faces of cactus, to the base. Bend and tape so that cactus now has two faces + base formed, see below.


Take the longest section of cardboard you have set aside. Pencil 2" in from edge, to create a 2" wide strip, which will become your cactus sides.


Cut the full length of cardboard piece. Fold a 1/2" to 2" flap at bottom edge (like before) to create a flap to tape and attach to bottom base of cactus.

Take an extra piece of cardboard and cut out small square/rectangular shapes about 1" x 1" or 1" x 1 1/2". These will become the corners to connect the side of cactus to the back face of the cactus.

Fold each small piece in half and tape one of the folded edges flat against the bottom interior face of cactus, every few inches, like pictured below.


Starting from the base of cactus begin taping the cardboard side of cactus to the flaps of small squares that line the edge of the back face. When coming upon a curve, flex and bend the side cardboard to mimic the shape of the flat face of the cactus and continue attaching and taping to small square edges.


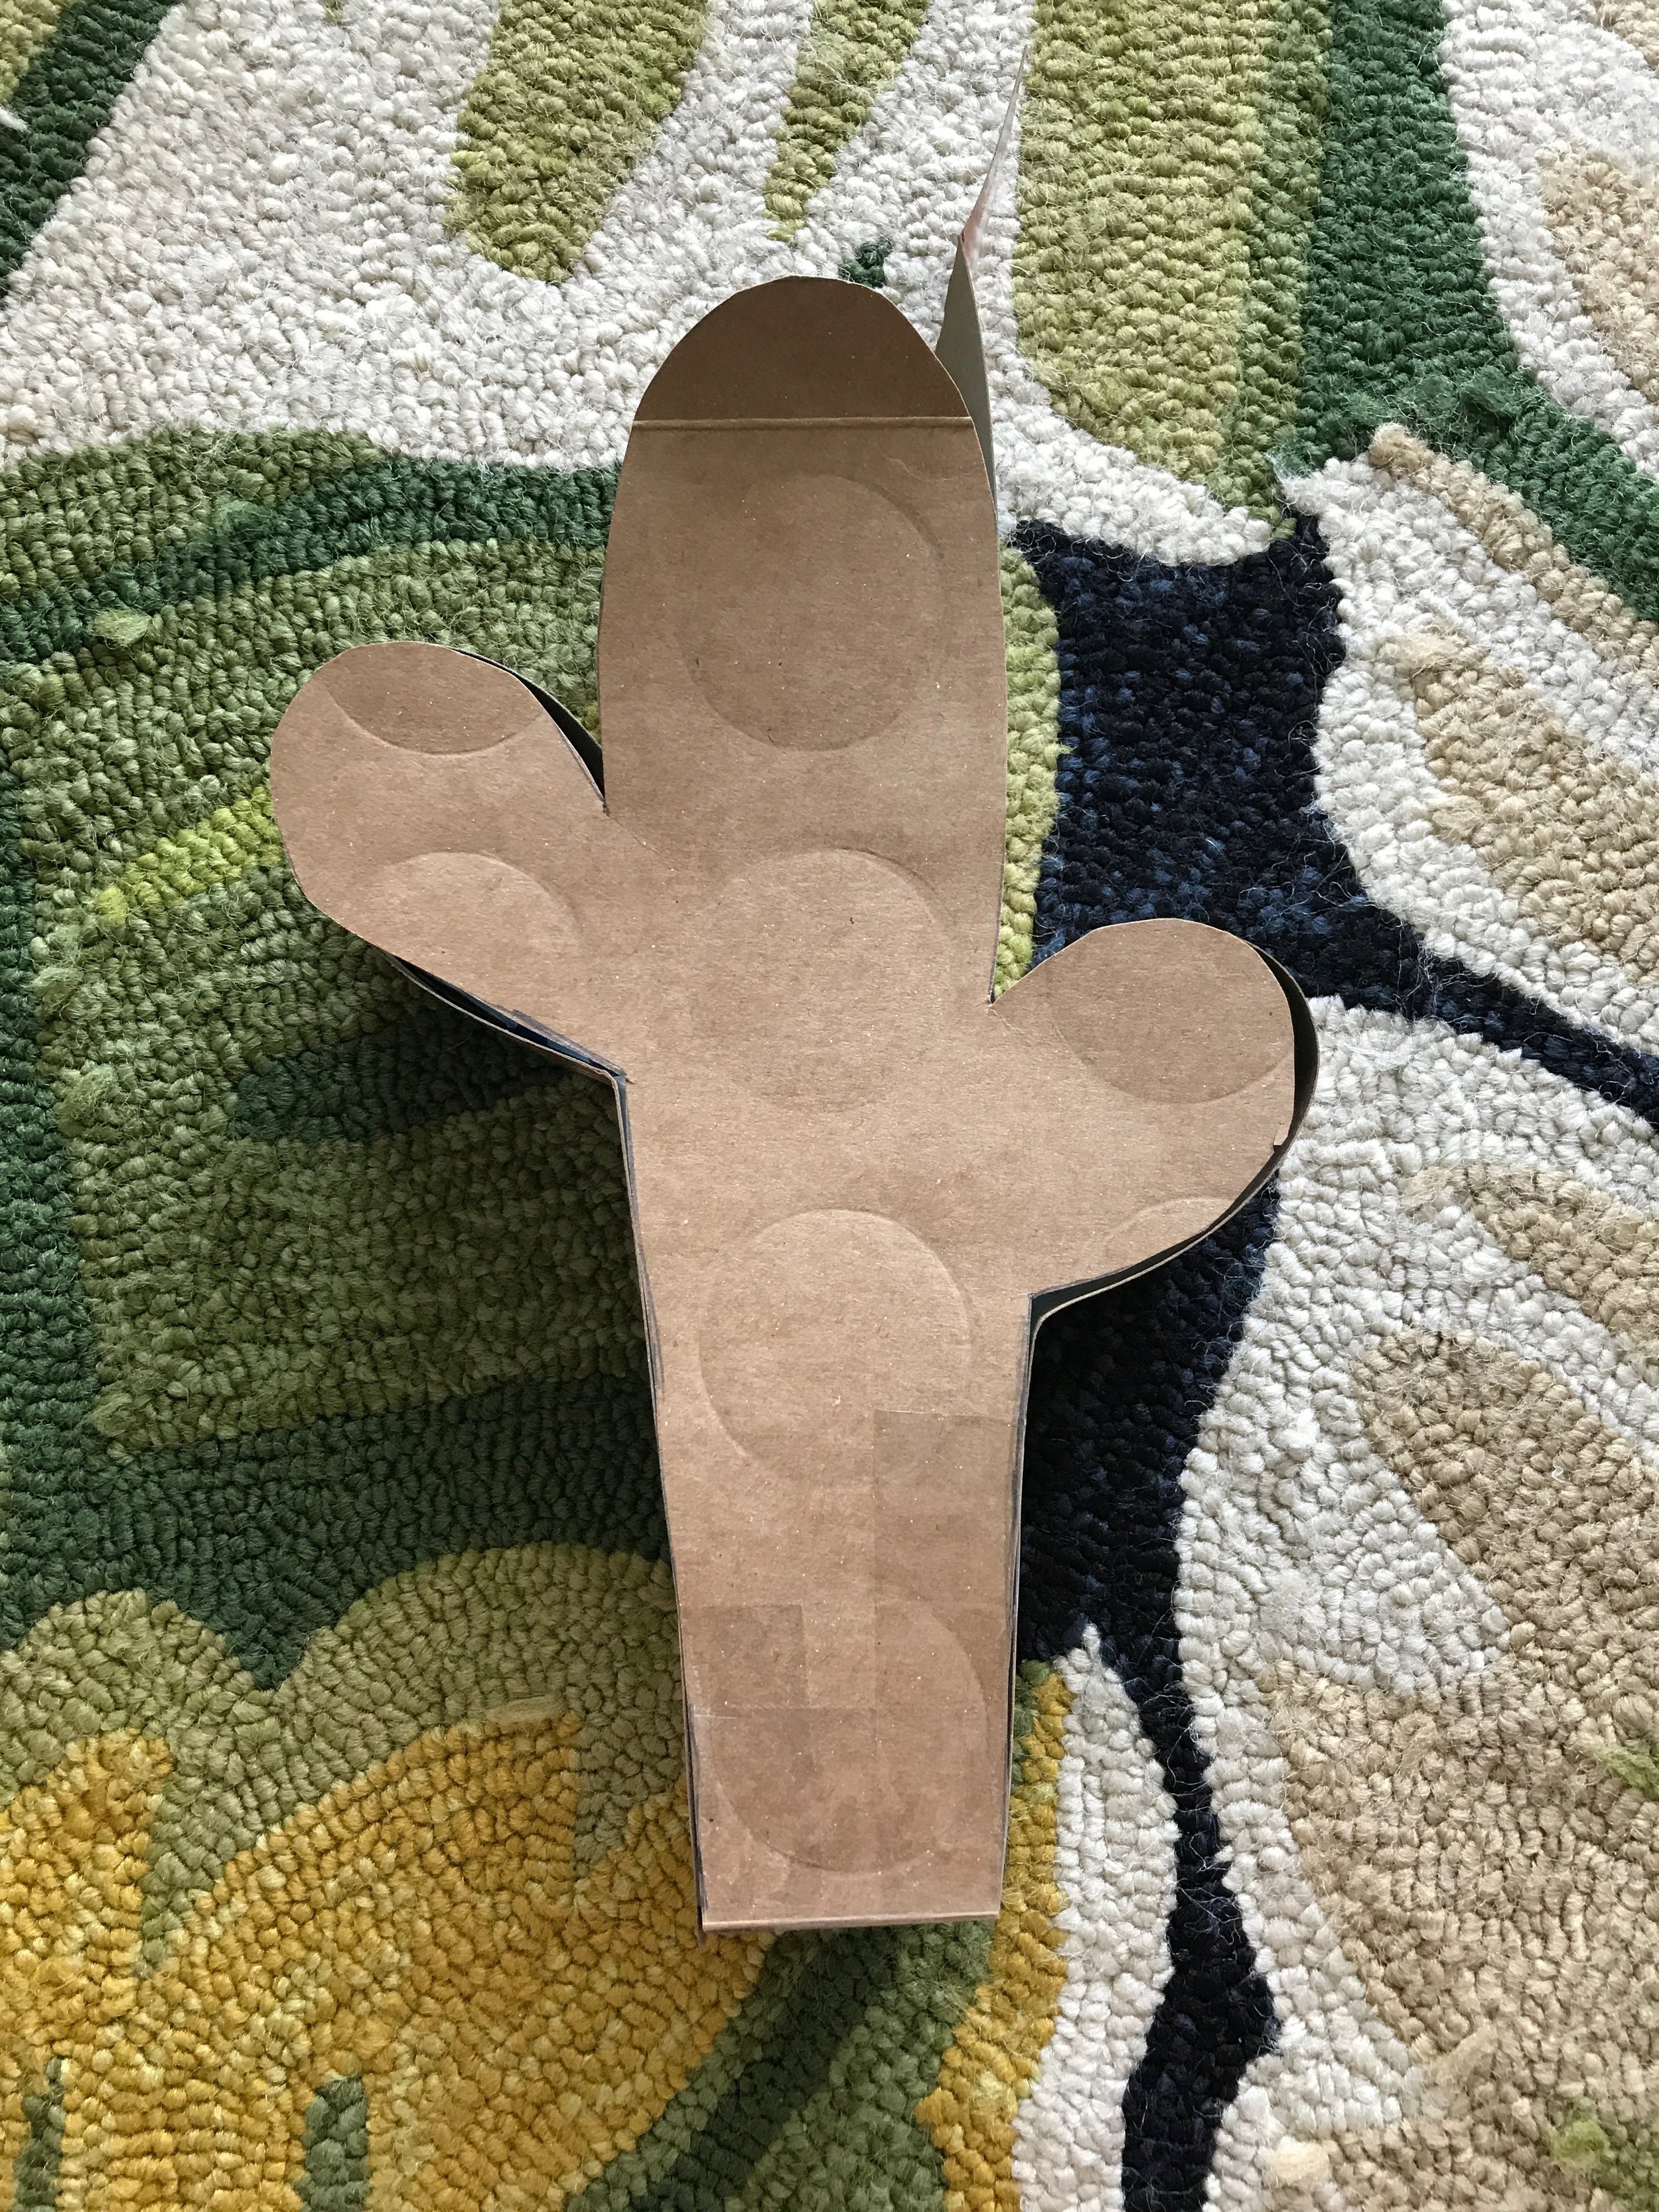
Once bottom of cactus and sides are taped and attached to one another, bring the last loose front face of cactus to lay against the edges of the cactus sides and begin taping shut along the entire edge. Leave a small opening at top so that you can put whatever goodies, you wish, inside.

Stack a few pieces of tissue and cut into 5" or 6" strips, then fold in half to be about 2 1/2" or 3" wide strips. Cut thin slits along the open edge of tissue, up and down entire length of tissue strip.

Cut a 2" wide long strip to cover and tape along entire side of cactus, before taping frayed pieces onto the face and sides.
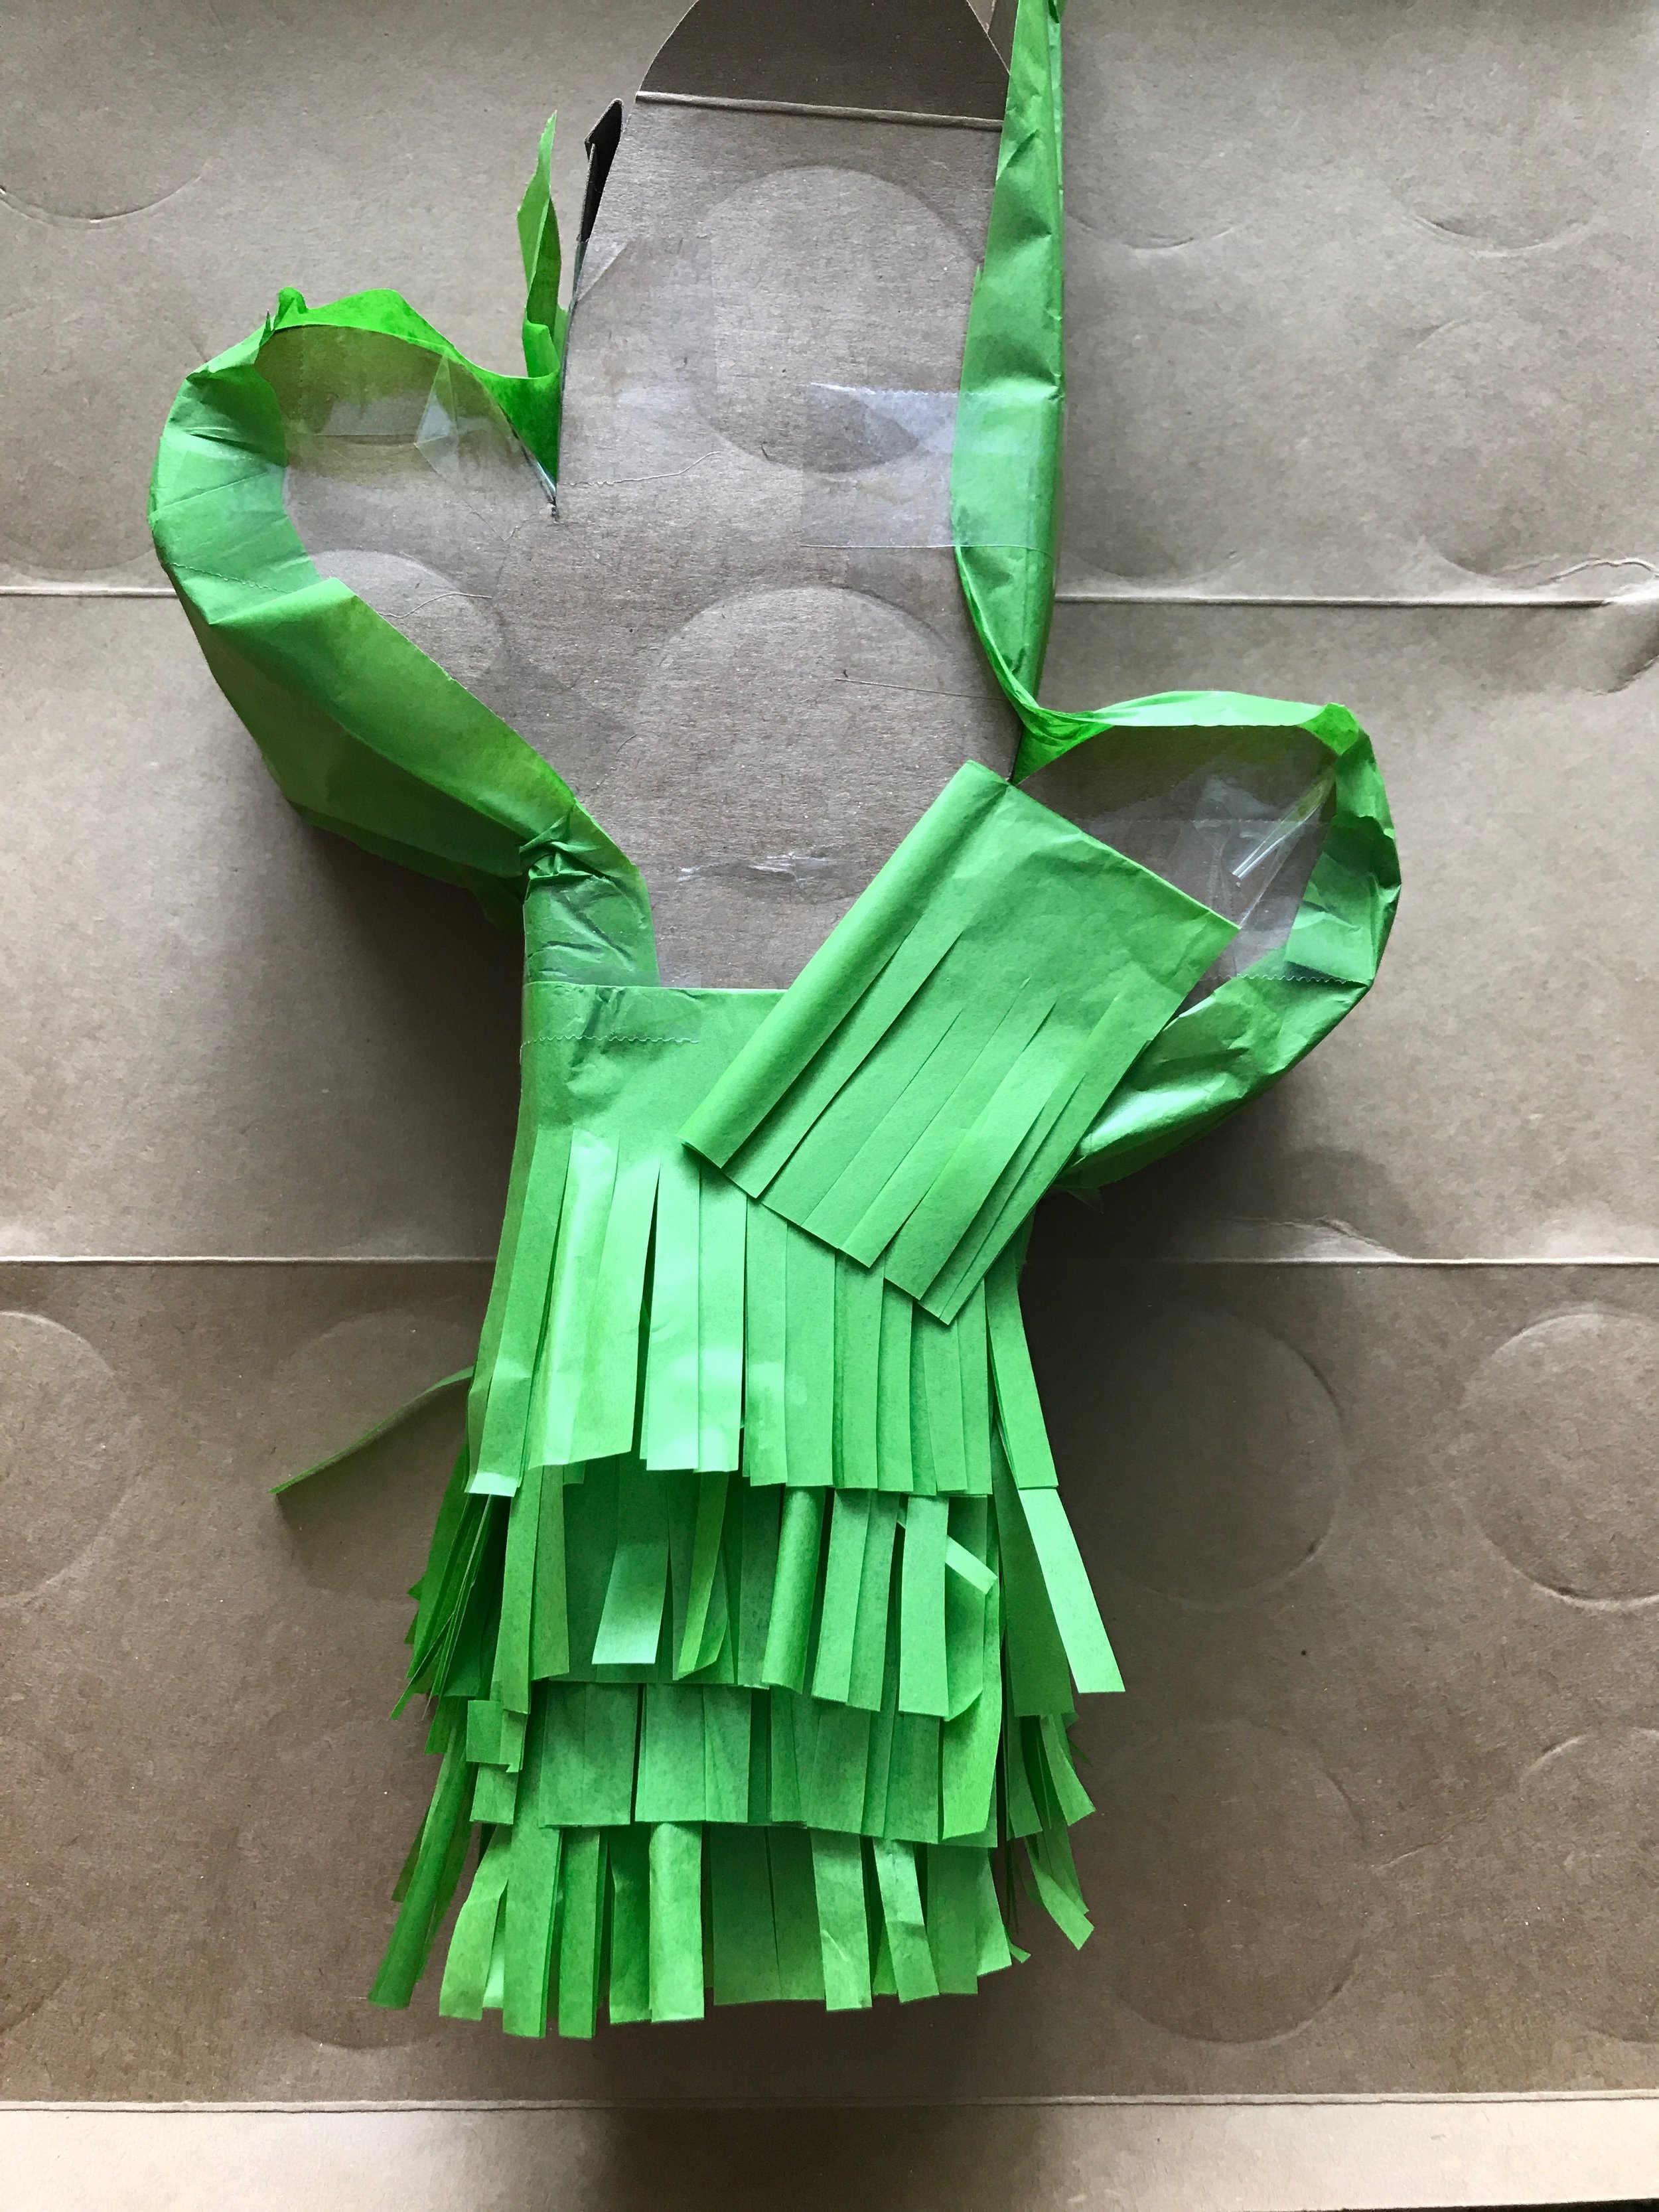
Repeat same step along entire front and sides of cactus. When approaching an odd shape along front face, cut smaller sections of tissue and mimic angles of the cardboard and continue overlapping tissue until it looks OK.

Pull the cut/slit sheets that are stacked on one another, apart and begin taping frayed tissue onto cardboard, one piece at a time. Wrap piece until it reaches the beginning edge of tissue, then cut and tape down.

Be sure to tape and lay tissue onto cactus starting from bottom of cactus and working your way towards top. The same goes for the sides and the front/back pieces.

Before taping cactus shut, fill with mini tequila bottles, or snacks, if for the kids! Lastly, before closing, wire a paper tissue flower to top side of cactus. Follow flower tutorial below.


Take one last 2" wide section of frayed green tissue and tape along top of cactus to close and hide cardboard seam. Fluff flower to cover the taped seam.


