


Espalier is French for the art of training plants, trees and vines to grow in a flat design pattern such as diamonds or horizontal rows. I had never heard of the word “espalier”, but I had seen it a lot since living in South Florida. It’s commonly done on fences, columns and walls resulting in some pretty spectacular curb appeal. I instantly became obsessed with the formation of espalier’s natural, yet trained beauty. Upon settling in our new home I knew the big stark white brick chimney, which is the center front focus of our home’s exterior, would look stupendous with a dramatic diamond pattern espalier. I was determined to create this trellis looking plant pattern without hiring an expensive landscaper. First, I just needed to find out what the darn thing was called so I could do the research to create it myself. That’s when my googling finally taught me all about “espalier”. If you too are feeling the whole love at first sight thing with this, please read along to see how we created our thriving chimney espalier.
I waited three months to share how this worked out for us because I wanted to make sure we had success before I shared our method with you. I read up on the topic of espalier as much as possible before taking on the project because I really wanted to make it work. I took away the commonalities from different approaches, what seemed like important tips and then Z and I gave it a go. I can confidently say, not only did we succeed (so far) with the outcome, but it’s actually doing better than expected. After only a few months the vines have filled back in from where they died off in the first two weeks. After planting the vine had some initial shock and died of some, but quickly thereafter began to thrive. The vines have already grown about three foot longer and taller than expected. I read it was unlikely for the jasmine to grow at all in the first year, as it usually takes time to root and get settled before climbing.
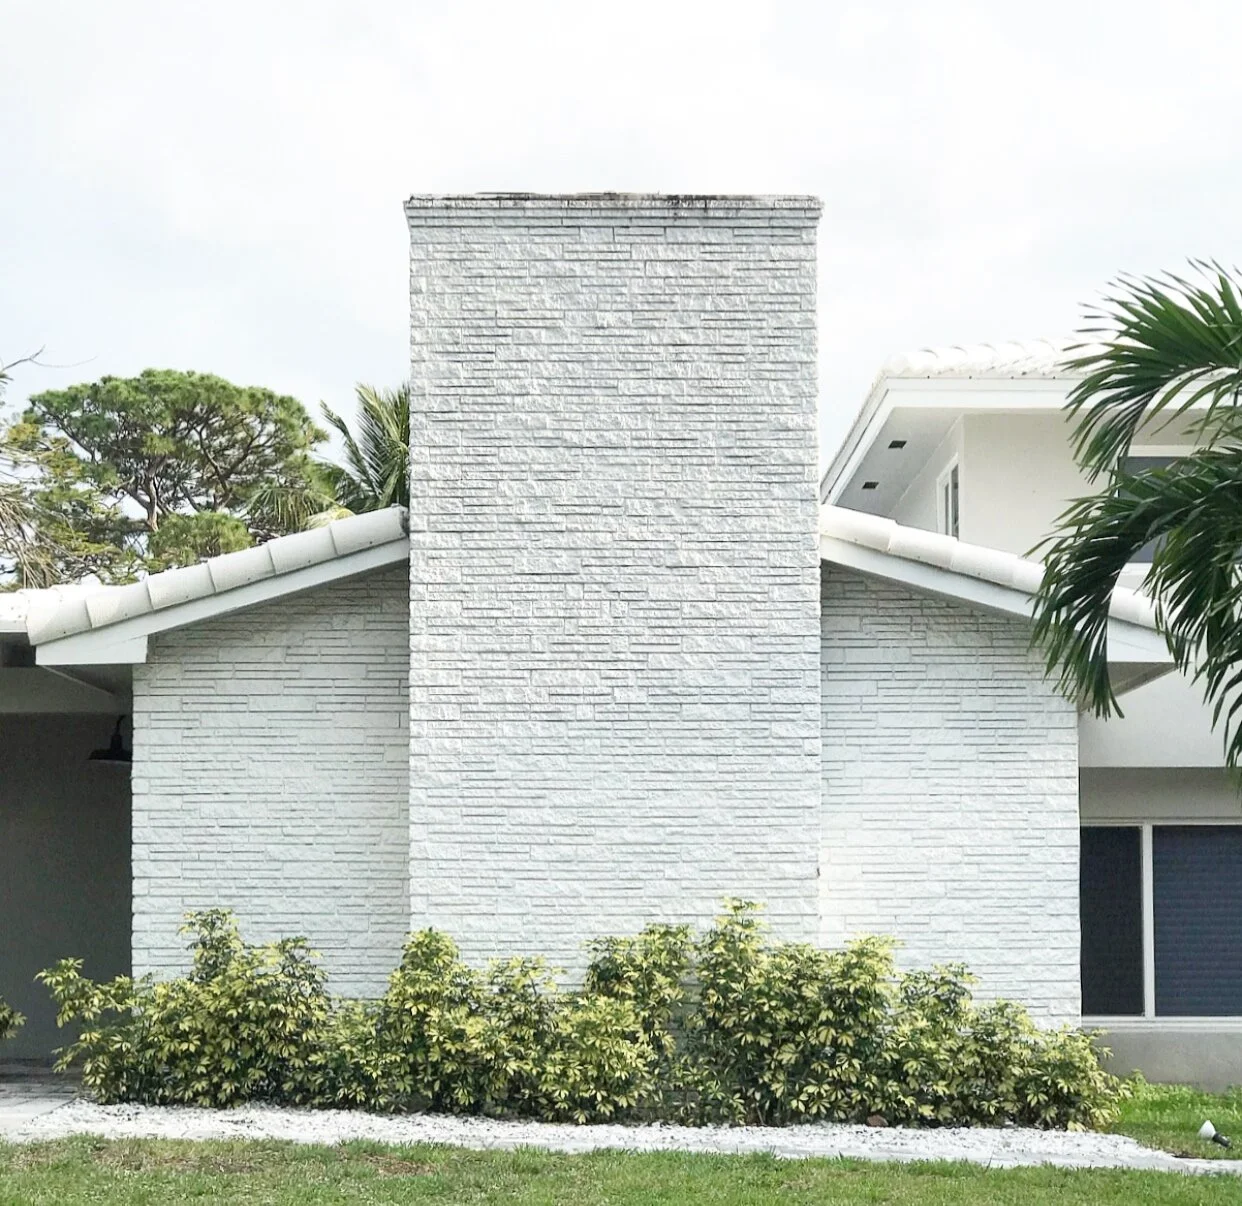
BEFORE PICTURE:
WHAT YOU NEED:
THE PLANT: We used four Star Jasmine plants. FYI, this is not toxic to dogs incase you were wondering (not actual jasmine). Also, worth noting this is a vine plant being used on brick in a sunny location which makes it safe to grow. Some types of vines and ivy grown on other materials may cause an issue to the facade and foundation of your home, but this is not the case here. We have the ideal chimney and scenario. This type of vine is best in Zone 8-10 climate in a particularly sunny location with water every few days. It blossoms tiny white star shaped looking flowers every April and May in Florida.
TOOLS: Measuring tape, painters tape, steel spring clamp, drill, drill bits, plastic ribbed anchors, screw eye hooks, ferrules, pliers, hammer, and vinyl coated wire rope and a ladder if you’re doing something as vertical as we did - 20ft!! (The nursery we ordered the Jasmine from advised it will grow up to 30 feet vertically)

HOW TO:
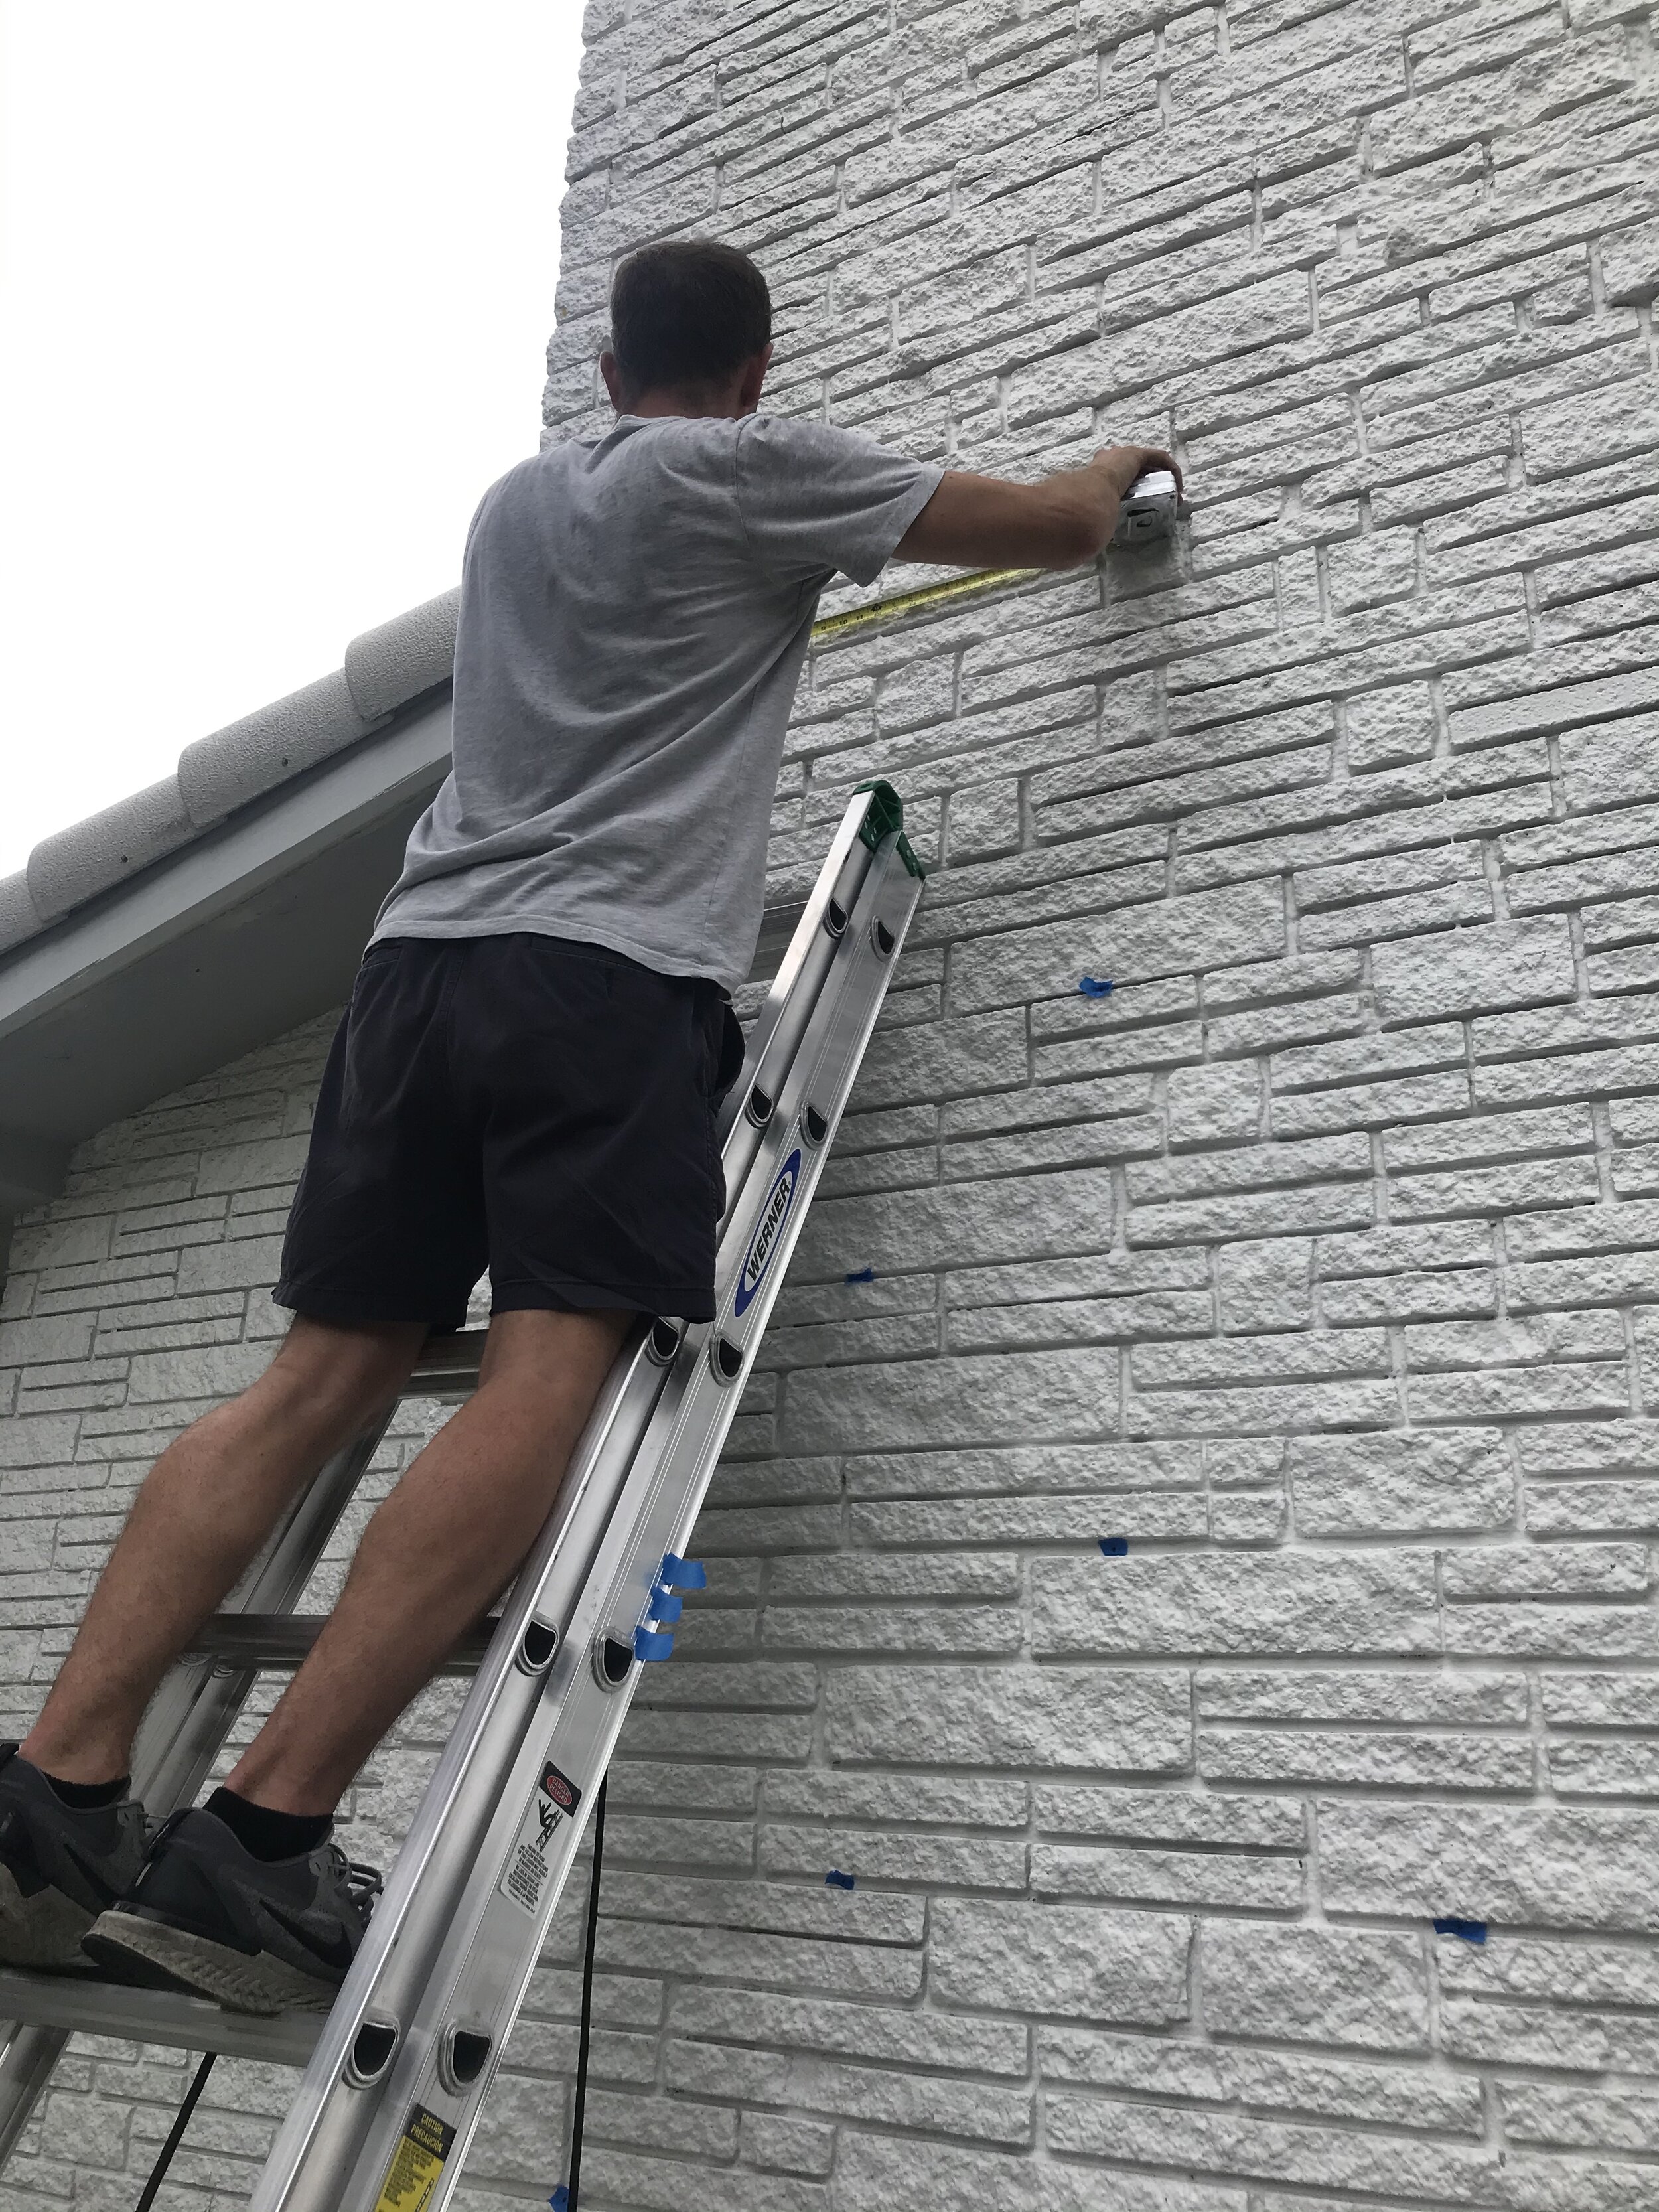
STEP ONE: Map out the exact space you’re working with. We measured the space and then I sketched it to scale. We centered a diamond arrangement 20 feet tall by 100” across with a little excess space along the vertical edge of the fireplace per our preference. It worked out close to perfectly in order to create 25”x25” diamonds. However, the bottom row of diamonds closest to the ground wound up being a few inches shy of 25” tall in order to visually start the diamonds where we wanted at the top of the chimney. Measure and mark off with tape where each corner of the diamonds meet and will be located. We started from the bottom and worked across, then up, row by row.


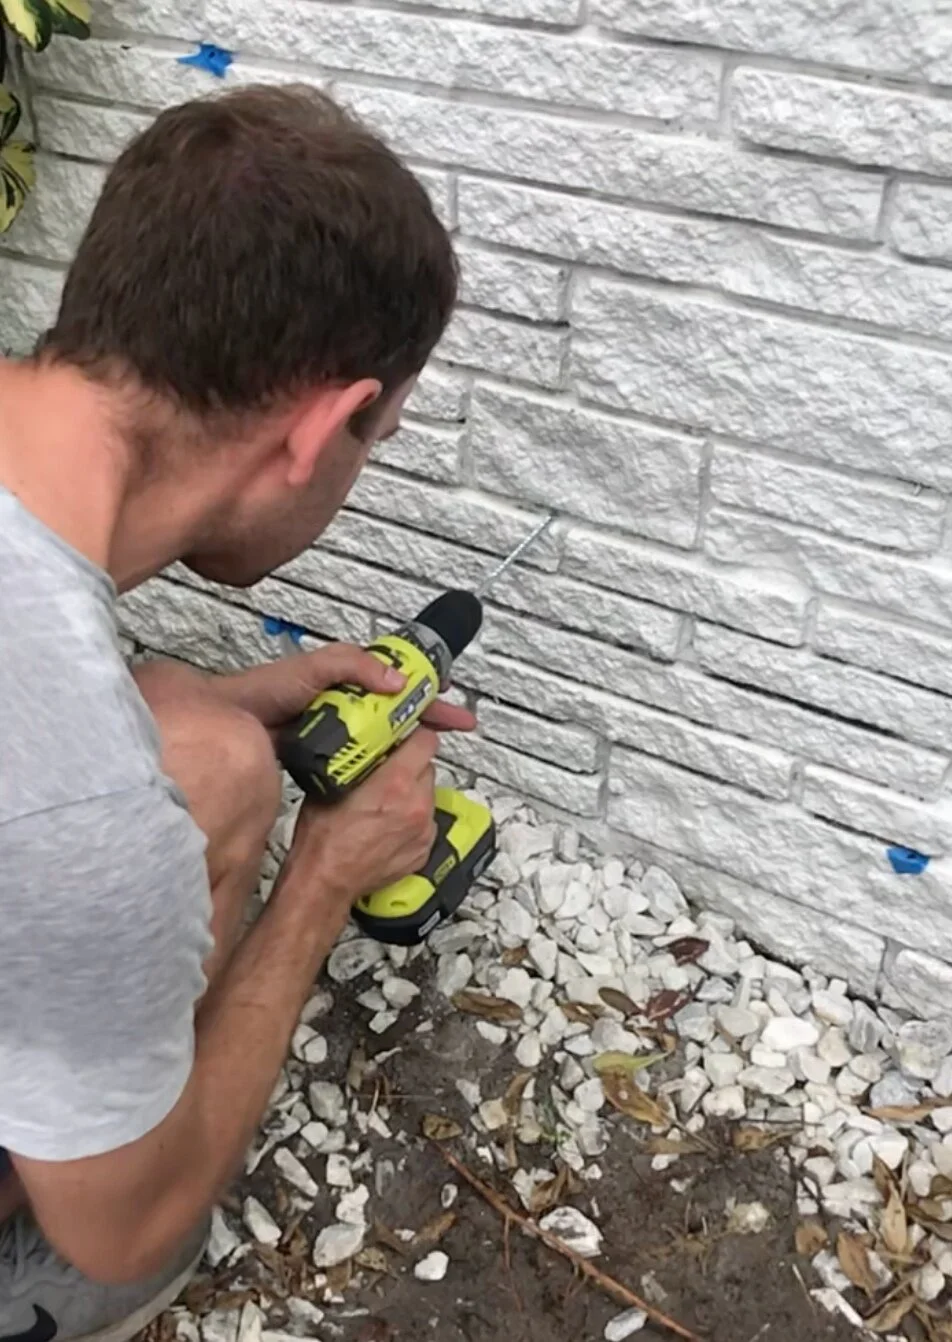
STEP TWO: Start screwing and securing. Drill an anchor at each marking, followed by a screw eye hook. Be sure to use large enough hooks so that when you feed the wire through the loops, the vine will grow off of the wall by an inch or so. This will give the plant room to grow around the wire and fill in evenly over time. This part of the project took some elbow grease from Zach and overall was the most time consuming aspect of the project.

STEP THREE: Get wiring. Start at the top and work your way down and across. To begin, crimp end of wire around the top screws. For our pattern we used 6 wires, 2 for each of the 3 screw eye hooks along the top of the chimney. To secure the wire at each hook along the top we used pliers and ferrules to crimp the ends. Wire cutters also came in handy to trim the ends. Then, we worked the wire down and fed each through the path of hooks from top to bottom in a zag zag way. To make sure the wire was taught all the way down the chimney, Zach double looped the wire through each hook as he went. The same method of crimping and securing the wire around the eye hooks at top, was done at the bottom, too.


STEP FOUR: Get planting. We dug a hole in the dirt, centered near each eye hook on the bottom row, four total. We used 2.5 gallon plants and dug about a foot diameter larger of a hole to give the root ball of the plant plenty of room to get comfortable. Be sure to loosely grab at the roots and dirt of the plant once you remove it from container. This will help the plant healthily into the new ground it will call home. Lean the plants in the hole towards the flat surface where the espalier will grow. Cover and fill in holes with preferred top soil. Then, remove the wooden trellis from the individual plants, leaving behind the main stake. Hammer and arm strength was required of us to remove the trellis from each plant.


STEP FIVE: Unwind plants. Once you have removed the existing trellis in the plant, start to separate out and unwind the plant from the main stake it is wound around. Gently untwist as if you are undoing hair braids and trying to prevent as many knots as possible. The looseness and untangled vine will be what you are working with as you rewind and guide the plant through the diamond espalier. The more separated you have it, the more flexibility you will have in determining which path you want the vines to grow up the wires. Once completely loose, remove stake and begin the next step of guiding your espalier.


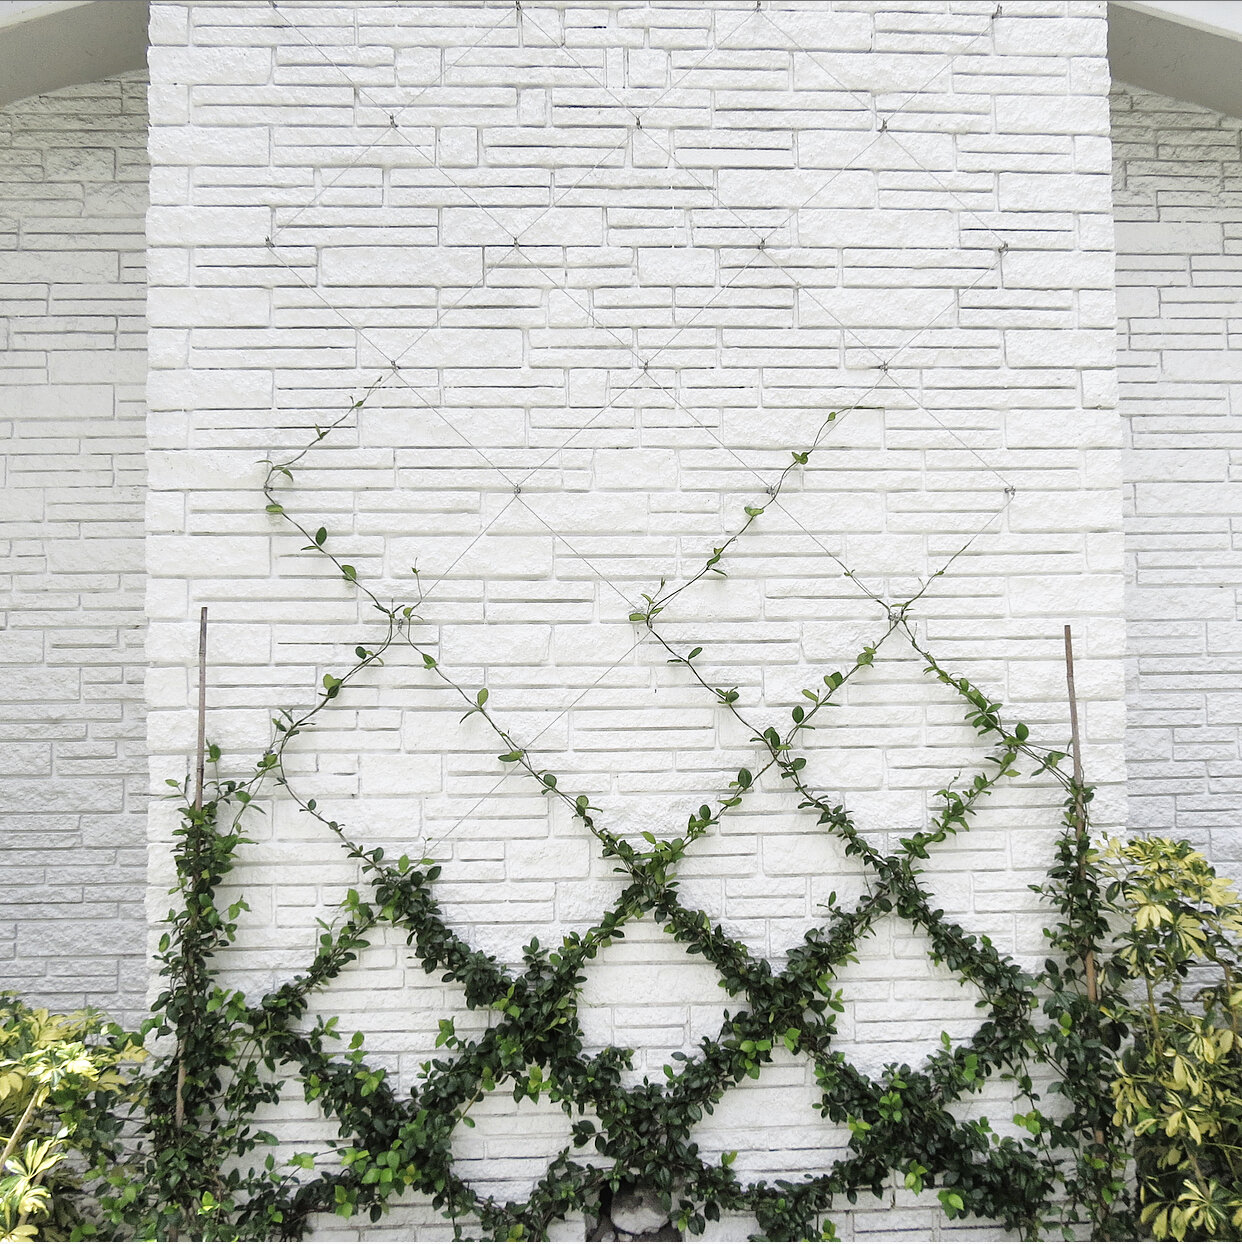
STEP SIZE: Begin guiding the plant. Gently guide the vine in and around the wired guide on your chimney or whatever you are working with. Do not be afraid to get a little handsy with the plant in securing it around the wire the way you want it. I was afraid of being too strong with it, but it worked out ok. I decided to put a stake back into the ground on the outside edge of the chimney on either side so that I could rewind a few vines straight up and give them a head start to fill into the higher up diamonds. You can see what I mean in the later images where the vines began to grow and I was able to work them in higher up without crowding the already very full diamonds towards bottom of chimney.


STEP SIX: Water, fertilize and watch! Then, continue to water, fertilize, watch, trim and guide the vine as it grows. The final images you are seeing here, are still not all final, as I have yet to prune the vine because I am still giving them time to fill in naturally in all spots towards bottom. Once my espalier fills out to a good height and thickness I will then landscape in front of the chimney and decide then If I should remove the stakes I placed along those edges.
THREE MONTHS LATER….


Some additional info: As mentioned, I read star jasmine vine will not grow the first year as it is roots, but will then grow anywhere from 3-6 feet a year each year after, up to 30 feet tall. Ours has already grown a few feet taller. How exciting, right!? This plant is rumored to have a sweet smell that attracts butterflies. I’ve yet to smell and see that so far, but I’m hoping next Spring I’ll be lucky. We can’t wait to see how this shapes overtime. I’ll be sure to keep you posted with our growth and an annual photo of Vane for height perspective. We hope one day in the next few years we will have a fully green and floral filled chimney - fingers crossed!!
xo RCN
One year later and look at the height this gorgeous grower has reached! The upkeep has been relatively minimal despite a few high climbs up the ladder to adjust redirect the growth back in and around the base wire. We haven’t used fertilizer and we do water about twice a week.