Hip Hop Carrot Cupcakes

Easter is a very special holiday for my family. This year will be the first that I will not be at my Mom Mom's Easter brunch - a tradition. I will miss being with the family, watching my niece, nephew, and cousins searching for eggs, and I will miss the delicious french toast casserole, danish, bagels, fruit salad, bacon, peanut butter eggs, list goes on. BUT, I decided to bring the brunch to Miami for me and Zach. No egg hunts, but there will be bacon...there usually is, almost every weekend. We also, of course, need a dessert or two ;) These hippity hoppity carrot cake cupcakes are perfect for Easter and any Spring time occasion. I chose the flavor based on the bunny theme and decided to search Pinterest for the most moist and tasty sounding recipes I could find. I picked a good one! Recipe below and link HERE for original from American Heritage Cooking. Hoppy Easter! xo RCN

Carrot Cake Ingredients:

2 cups all purpose flour

¾ teaspoon baking soda

¾ teaspoon baking powder

1 ½ teaspoons cinnamon

3/4 teaspoon kosher salt

3 eggs 

1 2/3 cups granulated sugar 

1 ¼ cup vegetable oil 

2 tablespoons lemon juice 

1 cup shredded & chopped carrots, packed 

½ cup walnuts, chopped 

Directions:

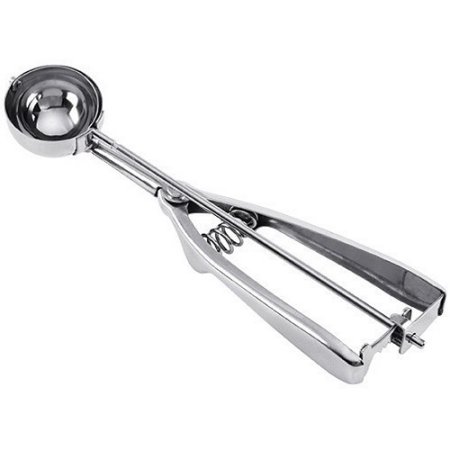
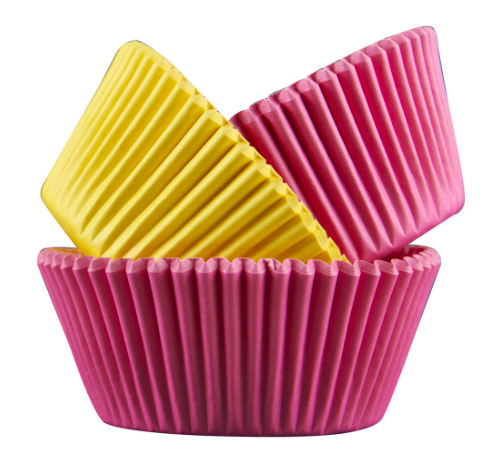
Preheat the oven to 350˚F and line muffin tins with cupcake liners (I filled 22 liners). Sift together flour, baking soda, baking powder, cinnamon and salt in a medium bowl and set aside. Combine lemon juice to the vegetable oil and set aside. Shred and chop carrots into small shavings, set aside. Chop walnuts, set aside. In a stand mixer fitted with the whisk attachment, whip together the eggs and sugar on medium speed until fully combined. Turn mixer to high speed and add in oil/lemon juice mixture. Mix until combined. Remove bowl from stand and fold in dry ingredient mixture, followed by walnuts and carrots. Fill liners using a small baking scoop - the best! I used two scoops per liner. Bake at 350 F for about 18-20 minutes. Remove from oven and let sit for a few minutes. Remove cupcakes from tin and let cool on a rack until room temperature before frosting and decorating.

Frosting Ingredients:

4 Cups Powdered sugar, sifted

1 Cup Softened unsalted butter, 2 sticks

1/4 teaspoon Salt

1 Tablespoon Vanilla extract 

4 tablespoons Milk

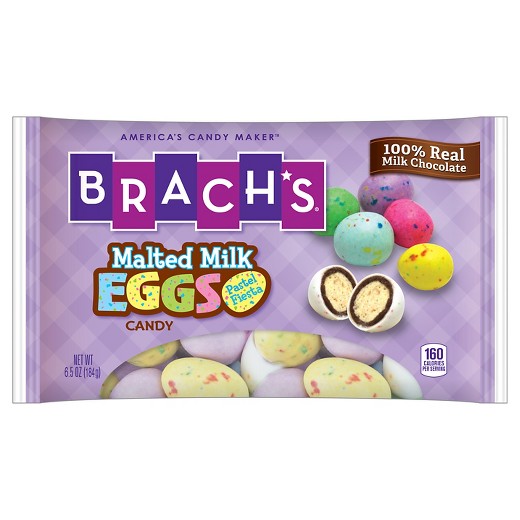
Malted milk eggs + shredded coconut (for decorations)

Directions:

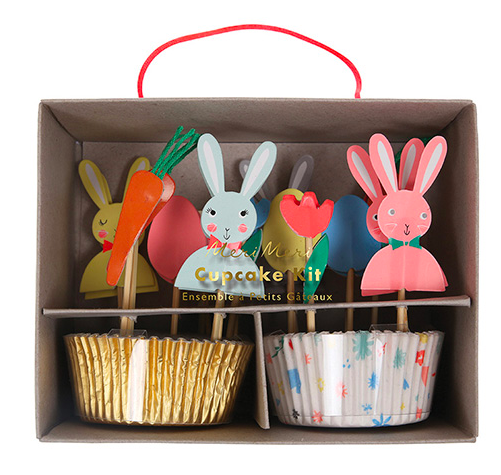
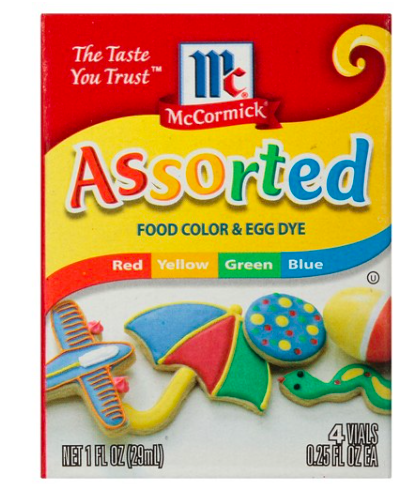
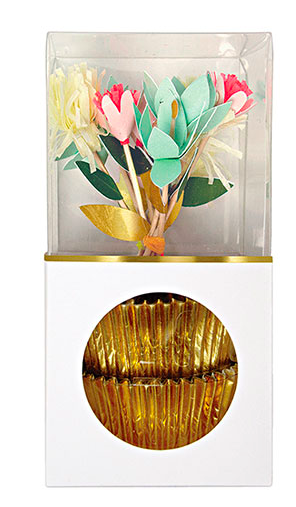
Combine all ingredients in a large bowl and mix thoroughly until frosting is smooth. Use a fork to help flatten out any remaining clumps. Remove half of the frosting and place in another bowl. Squirt 5-7 dashes of red food coloring in one bowl, 5-7 dashes of yellow in the other. Stir food coloring into frosting until completely combined. Place 2B Wilton Tip into 2 clear piping bags. Fill bags with frosting. Ice half cupcakes with pink icing and half with yellow. Add bunny toppers, malted milk eggs and a sprinkle of coconut onto cupcakes. Mix and match decorations on each cupcake and add a second contrasting liner to make all cupcakes a little extra special and individual.

 
Source: http://americanheritagecooking.com/2015/04...

Confetti Cookies

I spent the last few nights in NOLA celebrating my girlfriend Roxie's bachelorette. We had a wonderful time. I won't mention too many details about the trip, but we thoroughly enjoyed the food and drinks in New Orleans. We ate dinner at Seaworthy and Sylvain, brunched at Wilma Jean and Commander's Palace, munched on beignets from Cafe du Monde, and of course tried pork belly, shrimp, and roast beef Po'boys from a few different places.

I brought along some colorful celebratory cookies to have back at the house for when we weren't eating a million other snacks. These were simple to make, as I didn't use a homemade recipe. Sometimes, you just don't need homemade, especially in a time crunch! 

Instructions:

I divided pre-made Pillsbury sugar cookie dough and rolled into small balls and flattened with my hands. I varied the cookie sizes, the smallest being the size of a dime. Once the cookies were baked and cooled, I prepped the cookie icing. When following the directions to heat the icing, I only zapped in microwave for 10 seconds on 50% heat. I also let the icing sit for a minute before beginning to spread onto the cookies. Most importantly, I used a tooth pick to evenly divide and spread the onto the cookies. The alphabet cookie cutters and icing came from Michael's Craft Store. The icing portion part of this project took the longest, so give yourself a little time to work on this if you are making a lot of the confetti cookies. In the end, they are fun and worth it! 

This weekend was full of champagne, sweets, and lots of other food and drinks. I think I am in need of a little detox these next few weeks! xo RCN 


Banana Bread For Beau

Banana Bread is by far one of Zach's favorite baked goods. He doesn't have a big sweet tooth, but once the bananas in the kitchen begin to brown he always asks if I will, please, make Banana Bread. This time I planned on making the bananas turn, as I knew I would not be around for almost two weeks and wanted to leave Z with a few of his favorite foods and snacks.

I have baked many banana bread recipes, some with nuts, some with chocolate. I tend to love most of them, but I continue to try out new ones in search of what is the best. This time around I decided to try out a recipe from Food Network. Link HERE to go direct to site, or follow directions below. I recommend this banana bread - no burnt edges and moist in the center. Yum! xo RCN


Ingredients:

1 cup granulated sugar

8 tablespoons (1 stick) unsalted butter, room temperature

2 large eggs

3 ripe bananas

1 tablespoon milk

1 teaspoon ground cinnamon

2 cups all-purpose flour

1 teaspoon baking powder

1 teaspoon baking soda

1 teaspoon salt

Preheat the oven to 325 degrees F. Recipe will serve two paper loaf pans "around" size 3.5" wide by 7" long and 1.75" tall. Note: many loaf paper liners are greased, but if not then grease with butter or spray.

Cream the sugar and butter in a large mixing bowl until light and fluffy. Add the eggs one at a time, beating well after each addition. 

Cut three 1/2" slices of banana from the center (widest circumference) of one banana and cut each slice into a heart shape, set aside (for decoration on top of bread). In a small bowl, mash the remaining bananas with a fork. Mix in the milk and cinnamon. In another bowl, mix together the flour, baking powder, baking soda and salt. 

Add the banana mixture to the creamed mixture and stir until combined. Add dry ingredients, mixing just until flour disappears. 

Pour batter into prepared paper liners. Place filled paper loaf liners into metal loaf pans and place in heated oven. Bake 1 hour to 1 hour 10 minutes, until a toothpick inserted in the center comes out clean. About 3/4 ways through baking or ten minutes before removing bread from oven, place and press the three banana heart slices equidistant across top center of bread. Once bread is finished baking, remove liners from pan and set aside to cool.


Apple vs. Pumpkin

The question arises at dessert time every Thanksgiving with my family. "Pumpkin or Apple?". The most common answer spoken is, "Both". However, I can recall a few years when an apple pie was absent and other options, like cookies were available. This year, Zach and I are headed to my parent's home in New Jersey, and we are bringing the pie. Apple vs. Pumpkin is too difficult for me to decide, so I will be making both.

 I discovered the perfectly adorable and delicious recipe for mini pumpkin pies on the Diva's Can Cook blog. The recipe for both the filling and dough are easy to make. Do not be afraid of the dough. Follow the instructions and you should have no issue. My only advice is to continually add a little flour to your counter surface as you flatten out dough and begin cutting crust shapes out.  The dough will be sticky the more you fuss with it and will stick to counter if there is not enough flour on your surface. For a very easy apple pie filling I used a recipe from Pillsbury designed specifically for mini pies. Okay, so the question still is, Apple or Pumpkin?  You tell me in the comments section below.  

Enjoy! xo RCN

MY ADJUSTMENTS TO RECIPE: I doubled the dough recipe and split it between both my apple and pumpkin pie fillings. This will yield about 16 pie crusts with enough extra to lattice the tops of your apple pies. I decided to change the recipe from bite size to miniature pies by using a 3 3/4" flower shaped cookie cutter, rather than a 2 inch circle cookie cutter. Once I cut out all crusts, I flattened them a little more by hand to make them slightly bigger than 3 3/4", then I placed them into a a full size cupcake/muffin tin, rather than a mini tin. Each individual pie measures out to about the serving size of 2/3 of a regular slice of pie.

LATTICE CRUST FOR APPLE: After cutting out 16 flower crusts, I flattened out extra dough and cut thin strips for my lattice. You will need two, 2 1/2" strips and four 1 1/2" strips for each apple pie crust. Place both the longer strips in a cross format over-top of apple pies, once you have scooped apple filling into the crust. Then, add smaller strips to left, right, top and bottom of your cross shape and alternate them fitting over and under the longer strips of dough. Refer to pic of finished pies above.

ORIGINAL PUMPKIN RECIPE from Diva's Can Cook

Ingredients

Pie Crust (all ingredients should be very cold)

1¼ cup all-purpose flour

1 tablespoon sugar

½ teaspoon salt

¼ cup butter (chopped)

¼ cup butter shortening

¼ cup cold water

Pumpkin Filling

¼ cup brown sugar

¼ cup white sugar

4 tablespoons butter, softened

1 egg

½ cup heavy whipping cream

1 tablespoon flour

1 teaspoon pumpkin pie spice (can add more if desired)

½ teaspoon vanilla extract

1 cup canned pure pumpkin

Instructions for Crust

1. Preheat oven to 350 F

2. In a medium size bowl whisk together flour, sugar and salt.

3. Cut in butter and shortening until crumbly.

4. Stir in cold water.

5. Stir until dough forms.

6. Press dough into a disk and wrap in plastic wrap and refrigerate for 30 minutes.

7. When pie dough has chilled remove it from fridge and knead lightly a few times.

8. Flour a work surface and pat dough out about ¼ inch thick.

9. Use flower cookie cutter about 3 3/4"-4" to cut out dough

10. Press dough slightly by hand to flatten a little larger than 3 3/4", at least 4 "

11. Press the perimeter of the pie dough so that they completely fill the tin. 

Instructions for filling

1. In a large bowl combine white sugar, brown sugar and butter until creamy.

2. Mix in egg, heavy cream, flour and vanilla until creamy.

3. Fold in pure pumpkin and pumpkin spice. 

4. Place the batter into the pie crusts using a mini ice cream scoop, about two scoops each.

5. Use a spoon to smooth out and level the filling in each pie.

6. Bake for 25 to 30 minutes or until the centers are set and crust looks golden. Be careful not to over bake, keep an eye while they bake for the last few minute.

7. Pies will be puffy when they come out of the oven, but will sink back down when cooled.  Let stand a few minutes, remove from pan and let cool completely on counter.

8. Top with whipped cream before you serve.

ORIGINAL APPLE FILLING RECIPE from Pillsbury

Ingredients

2 apples, cored, finely chopped (about 1/4-inch pieces) 

2 tablespoons sugar

1 tablespoon All-purpose flour

1/2 teaspoon ground cinnamon

1 teaspoon vanilla

Instructions for filling

1. In medium bowl, stir together apples, sugar, flour, cinnamon and vanilla. 

2. Divide mixture into pie crusts. (Top with lattice crust, instructions above)

3. Bake 20-25 minutes or until crusts are golden and center is bubbly.

4. Cool for a few minutes and then remove pies from pan to completely cool on counter.

 
Source: http://divascancook.com/mini-pumpkin-pie-b...

Red, White, Blue & Vodka

Election Day is tomorrow. Often people recommend avoiding political conversation with people you do not know or even with family and friends. This election year it may appear more obvious why this is advised. The anticipation through out this year's presidential election has had us all on the edge of our seats during each debate, news conference, what have you. The nation has been going wild all throughout 2016.  So for everyone's sake, no matter who you are voting for, what party you belong to, what race, religion, or gender you are, I have just the thing.

How about a red, white, and blue JELL-O shot? This will do the job both leading up to and/or after our 45th President is announced. Slurp 'em up folks. Hopefully this takes the edge off, and lastly, God Bless America! xo RCN

What you Need: 

1 Cup Vodka of choice

1 Box Cherry or any red JELL-O flavor of choice (3oz)

1 Box Berry Blue JELL-O (3oz)

2 Cups boiling water, 1 per box JELL-O

1 Cup cold water, 1/2 cup per box JELL-O

1 Pack 2oz clear tasting cups (will use about 20)

1 Can Whipped Cream 

Red & Blue crystal sprinkles

Gold & Silver metallic pom poms

Toothpicks

Mini USA flags

  1. Boil cup of water.
  2. Empty red JELL-O powder into a large mixing bowl and add boiling water.
  3. Keep stirring for about two minutes or until the JELL-O powder is dissolved.
  4. Add 1/2 cup of cold water and 1/2 cup of vodka.
  5. Stir until mixed and pour into 2oz. cups filled 1/2 way.
  6. Refrigerate about 30 minutes or less, until red JELL-O is firm.
  7. Repeat steps 1-5 with Blue JELL-O, pouring the blue JELL-O on top of the red JELL-O filling to the top of the 2 oz cups.
  8. Refrigerate JELL-O cups while finishing the decorative toppers.  

Toppers:

Stick pom poms onto top of toothpicks, make enough silver and gold, one of each for each cup of JELL-O.  Once JELL-O shots are firm and chilled, squirt a spiral of whipped cream on top.  Sprinkle with red and blue sugar sprinkles and stick a mini flag, and both pom pom toothpicks into top center.  Be sure to keep in fridge until serving or whipped cream will melt and flatten.

Perfect for any red, white, and blue kind of celebration, cheers!


Eye Love Halloween

There are countless great things about Halloween.  Creating original costumes, replicating favorite super heroes, carving pumpkins, eating lots' of junk food.  I love it all.  Here is a quick treat and template to make and decorate some very creepy Halloween Eyeball Cookies.  They are perfect to share with the kids and adults for any Halloween celebration.

My eyeball cookies partly belong to Pillsbury.  After all, the dough did come from a box, Pillsbury Sugar Cookie Mix.  But, who am I kidding acting as if it's a bad thing.  Pillsbury dough and mixes are wonderful and when I am in a pinch for time it is my go to baking brand. 

Step 1:  Bake cookies and let cool

Step 2:  Create foil template for red dye veins, template below

Step 3:  Use stencil for veins on all cookies 

Step 4:  Use green icing to pipe circles in center of each cookie

Step 5:  Place candy eyeball in center of each green icing circle

Step 6:  EAT!

Here is what you need...oh, and aluminum foil and a pencil too!