


This week is, for sure, a special Birthday week in our family. My little, and youngest, sister Shaina, turns 21 today!! That's an exciting year to celebrate. When I see her on Sunday, I either want to make her a cake as pretty as the one I made yesterday for my BFF Colleen's 30th Birthday, OR we are going out for Rita's water ice, and i'll spike her water ice with Vodka ;) My one and only niece, Genevieve, celebrates her birthday tomorrow! So many birthdays, and all for the ones I love dearly. I absolutely love making Birthday cakes. Yesterday, I attempted my first Naked cake. If you haven't already heard the term, you likely have seen a naked cake and didn't know that's what it is called. It's when a layer cake is exposed, and the filling and frosting only coats the edges of the cake where the cake layers meet and sometimes (like this cake) the surface edges are thinly and sparingly coated with a little of the frosting. It has been a wedding cake trend for a while now, but finally I made one of these rustic and natural beauties for a Birthday. To top off the prettiness, I cut some fresh flowers and leaves to decorate the top. The cake turned out to be as delicious as pretty. See Country Living's recipe below (or click HERE) for vanilla cake and my buttercream frosting. I wrote in some basic directions on creating the perfect 4 1/2" round naked cake. Happy Birthday S, G, & C! xo RCN


Cake Ingredients:
1½ c. sifted cake flour
1½ tsp. baking powder
¼ tsp. salt
½ c. unsalted butter
1 c. sugar
2 large eggs
½ tsp. vanilla extract
½ c. whole milk
Buttercream Frosting Ingredients:
Mix and combine all ingredients until it becomes a smooth frosting texture.
3 cups powdered sugar, sifted
1/3 cups butter, softened
3 tablespoons milk
Baking Directions:
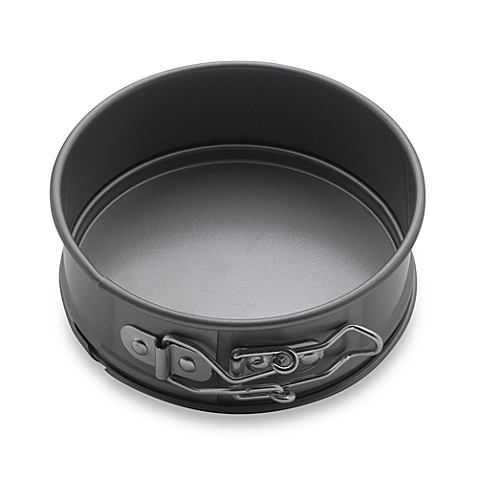
Heat the oven to 400 degrees F. Lightly coat four 4 1/2" cake pans (I used spring form) with butter and dust with all-purpose flour. Sift the cake flour, baking powder, and salt into a large mixing bowl. Place mixture in electric stand mixer with whisk attachment. Beat in the butter one 1/4 teaspoon. Mix on low speed until the mixture resembles coarse sand (may be a 'bit larger grains than sand). Next, beat in sugar one tablespoon at a time, until the mixture resembles fine damp sand. Beat in the eggs one at a time. Add the vanilla and milk, and beat on medium-high, just until blended. Do not overbeat. Pour equally into four 6" cake pans. Bake for about 30 minutes, until toothpick inserts at center of cake and pulls out smoothly without wet batter. Remove from oven and let sit for a few minutes. Remove from cake pans and set to completely cool on wire rack.
Assembling and Decorating Directions:
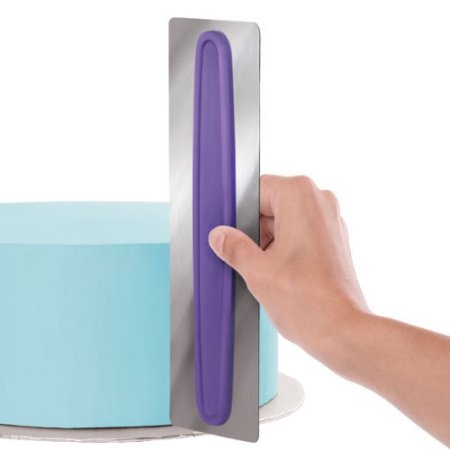
First, decide what cake stand or platter you want to use to display your cake, set aside. Once cakes are cool, trim off the dome of each mini cake with a serrated bread knife. The goal is to cut the tops off each cake to create flat surfaces that will allow you to easily stack each cake on one another. Grab cake stand or plate and buttercream frosting. Place a smudge of frosting at center of plate. Grab one layer of cake and place centered on the frosting on plate, push down to help secure the cake. Cover the top surface of the cake layer with about a 1/2 inch of frosting, frost all the way to edge of cake, its even better to let a little hang off the edge. Place next layer on top of first layer. Continue all steps until you reach your 4th layer. Frost the top of the cake and smooth the top surface. Take an icing smoother, link below, and smooth out all edges of the frosting insides of cake. Continue using edge all around the sides of the cake and at all layers of the cake to smooth and spread a random and sparing amount of frosting on the cakes exterior, just like images below. Lastly, cut fresh flowers, leaving no stem for small flowers, and a tiny stem on big flowers (bigger flowers may shift more so a little stem allows you to stick more firmly into cake and frosting). Leave stems on leaves as well, as they will be the last decoration to add, underneath flowers and you will need stem to stick in from underneath flowers. That's it!